
Protect your iPhone from threats
with free Avast Mobile Security
Games have become more realistic, more epic, and more fun. But for the ultimate experience, you need some real horsepower to support today's PC games. In this guide, we’ll show you how to build the perfect gaming PC from scratch. You’ll save money not having to buy a pre-built machine, and you’ll have fun building it, too!

Before we dive into our recommendations, let’s go through the basics. Below are the parts you need to build a complete gaming PC.

This Article Contains:
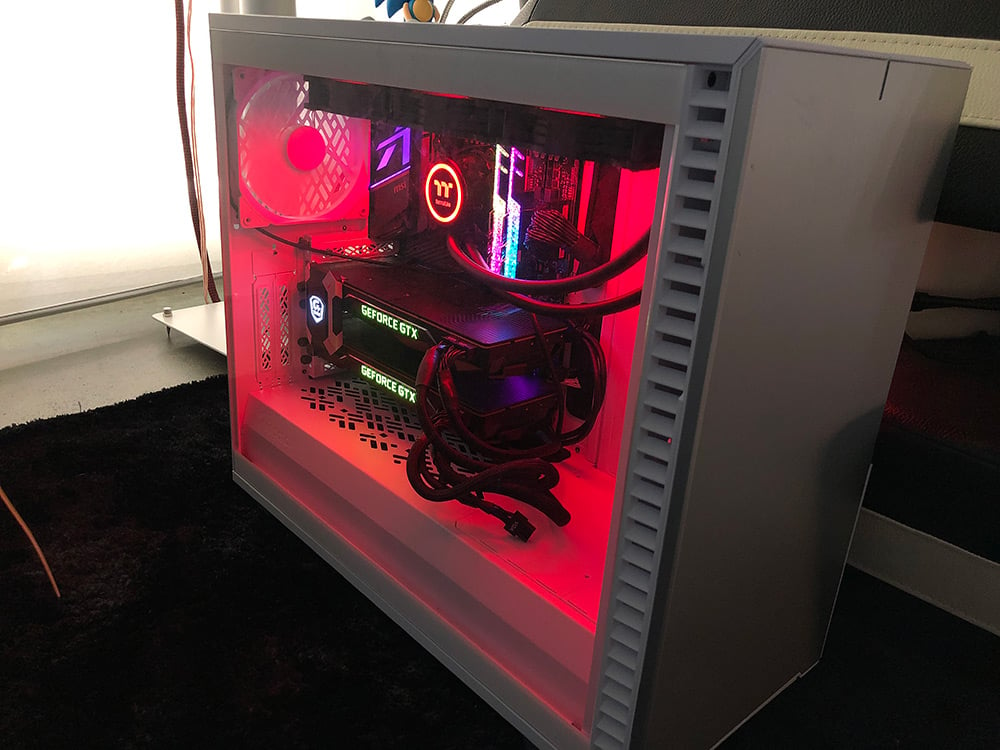
Cabling is still a bit of a mess on my PC, but it’s 100% mine, nothing factory-built. And I saved some money in the process.
Your processor — the CPU, or central processing unit — is the heart of your computer. It’s responsible for most of the operations your computer performs. For gaming, we recommend you go with at least a six-core AMD or Intel CPU of the latest generation.
While AMD is very competitive in the current processor market thanks to its aggressive pricing, Intel is still killing it in the gaming department. Their higher-end CPUs are capable of reaching higher clock speeds, which is what games prefer these days. While you’re building your own PC, you might be interested in overclocking your CPU as well.
We explain here what RAM is, but how much do you need for gaming? Well, the gold-standard size is 16 GB of RAM. This is still plenty enough to run all modern games without any glitches. In our tests, moving up to 32 GB of RAM had little to no effect on performance. That’s why I stuck to 16 GB but invested in higher-quality memory with a high frequency and low latency (click the link about RAM just above to find out more about what all that means).
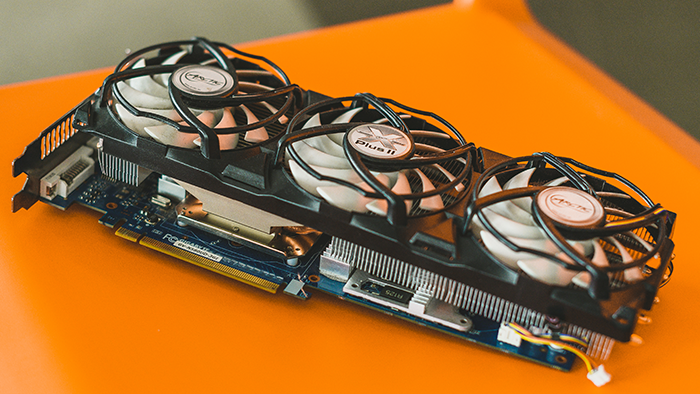
The GPU (graphics processing unit) is the key to playing games. Your GPU is likely going to be the most expensive part of any gaming PC. Graphics cards range from around $200 for budget gaming at Full HD resolution to around $1,500 for absolute high-end monsters capable of running 4K super smoothly.
Enjoy optimal gaming performance from your graphics card by overclocking your GPU and updating your graphics drivers.
Get an SSD. Period. (If you’re unsure why, check out our primer on the difference between an SSD and a HDD.) The days of old-school mechanical disks are over. While those old disks are still cheaper and sometimes larger, no gamer should suffer through loads (pardon the pun) of loading screens. With an SSD, especially the new NVME type, you’ll get speeds of up to 5 GB per second. Also you should get at least 1 TB of storage space, as games tend to be pretty large these days — some consume more than 100 GB.
Either way, it’s important to save enough space for the games you want to play. Avast Cleanup’s built-in Disk Cleaner will automatically clear out junk files and other unnecessary programs, ensuring plenty of room for the next AAA blockbuster.
If you’re building a beefier system with a higher-end card and processor, you might want to get a power supply with at least 700 to 1200 Watts.
This is where you can get creative. You can get a sleek case like the Fractal Design R7, or you can get something more unique like the Thermaltake View 71 or the Snow Helicopter.
Whatever you choose, make sure that it’s an E-ATX case. That’s a standard used for full-size PCs, and it’s important to pick the right motherboard. There are smaller cases for tiny PCs, but in this article, we’ll focus on mid-sized to large PC towers, because they allow for more airflow and larger components.
No gaming PC is complete without the proper accessories. The top things you need for your gaming PC are:
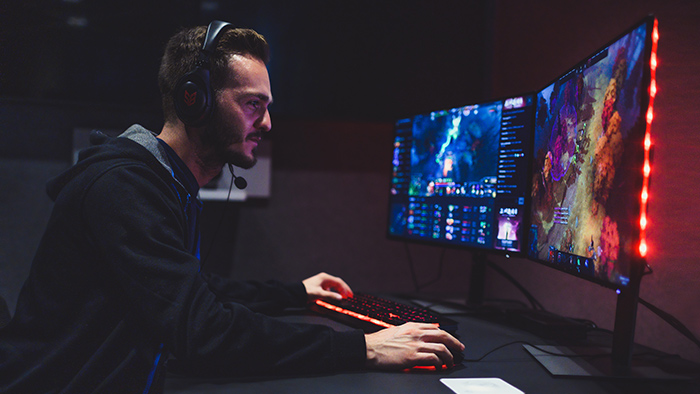
A gaming monitor: Your old TV or monitor probably doesn’t have high enough resolution for optimal gaming, and it may not support the high refresh rates that make games feel smooth and precise. When shopping for a new monitor or TV, make sure it supports WQHD (2560 x 1440) or 4K (3840 x 2160) resolutions. Also look for refresh rates of 120 Hz or more. While 60 Hz (for 60 FPS) appears smooth, once you’ve seen refresh rates above 120 Hz, you won’t go back.
Controller: While a mouse and keyboard give you precise control for real-time strategy games and shooters, many third-person action games play best with a dedicated controller. My personal favorite, while pricey, is the Microsoft XBox Elite Controller 2. It’s got an eye-watering price tag of $179, but you’ll get the best material quality, some serious heft, switchable buttons, and wireless charging.
Gaming mouse and keyboard: Your standard set isn’t meant for gaming. Especially when looking for a mouse, you want to look at specific gaming components. For example, Logitech’s new G604 mouse offers extremely fast scan resolution and has a dozen programmable buttons.
Windows: To run current games, you need Windows 10. Luckily, licenses aren’t extremely expensive, so you should be able to find Windows 10 Home for under $50.
A gaming rig can start as low as $500 and can easily go as high as $5,000. When deciding how much cash to invest in your gaming PC and what parts you should buy, the type of games you play should factor heavily into your decision.
Low-end games include games older than five years, browser games, and more straightforward, 2D strategy games. These don’t require a lot of horsepower. So if that’s all you’re going to play, then there’s really no need to build a gaming PC, because a majority of these games will run on regular office or multimedia PCs or desktops.
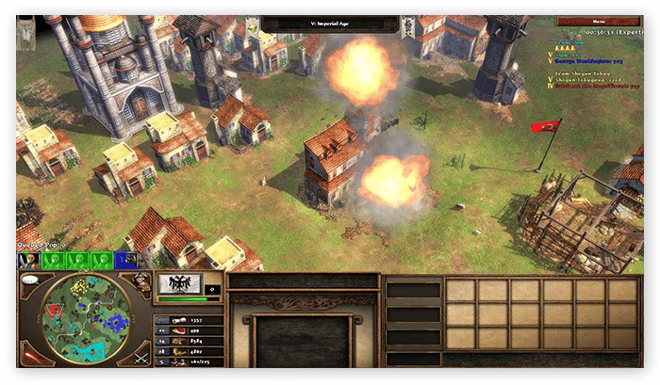 A screenshot from an older, low-end game.
Fortnite, Valorant, Minecraft, DOTA, League of Legends, and similar titles are all highly optimized for multiplayer gaming. They’ll run well even on weaker PCs.
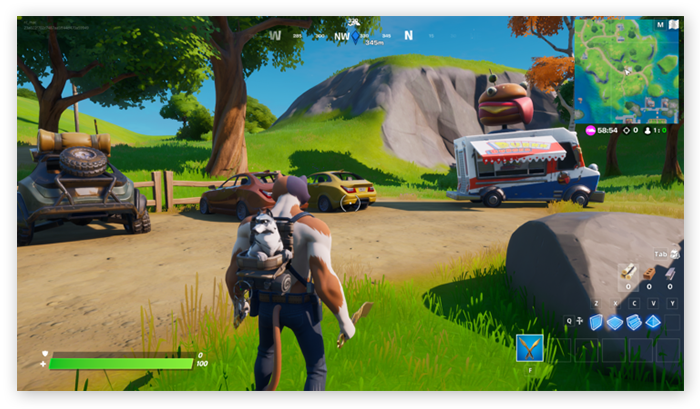 A screenshot from Fortnite.
If you’re into the latest blockbusters and want to enjoy every last pixel, you will definitely want to invest some cash into your gaming PC — you’ll need at least a mid-range graphics card.
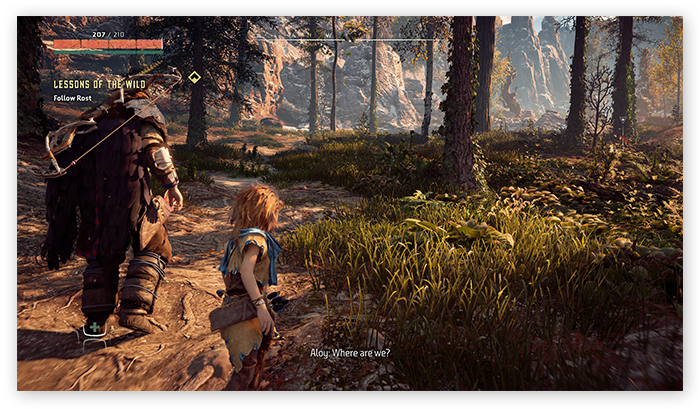 A screenshot from the top-tier game Horizon Zero Dawn, in 4K Ultra settings.
Let’s move to the more important question: What sort of resolution are you looking for? The most common resolutions are Full HD (1920 x 1080), QHD (2560 x 1440), or 4K (3840 x 2160). Most TVs and screens sold in the last 10 years support only Full HD. You’ll see some loss in visual fidelity at Full HD when compared to higher resolutions.
Many gaming monitors support QHD, which provides a visible upgrade in terms of fidelity over regular Full HD screens. 4K is found on nearly all TVs sold nowadays and quadruples the pixel density of a regular PC.
Depending on what kind of screen you have or want to get, you’ll be looking at very different specifications for your PC hardware. That’s because higher resolutions demand more power from your PC.
Once you’ve figured this out, it’s time to assemble your PC. Below are our recommendations for specs based on your desired resolution.
Budget: $900
CPU: AMD Ryzen 3600 (6 cores, 4.2 GHz): ~$200
RAM: G.SKILL F4-3600C19D-16GVRB Ripjaws V: ~$75
Cooler: Cooler Master ML240 liquid cooler: ~$80
Motherboard: Asrock B450M: ~$80
Graphics card: AMD Radeon RX580: ~$180
Hard drive: Crucial P1 1TB 3D: ~$100
Power supply: Cooler Master MasterWatt 550: ~$90
Case: Thermaltake S300: $80
Total cost: ~$885
This rig is based on a six-core AMD CPU of the latest generation. Since games start to see better performance on CPUs with at least four cores, you’ll enjoy a noticeable boost. We’ve also put in higher-clocked 3600 MHz RAM and, crucially, we’ve gone with our choice for the best budget graphics card: the RX580.
This should be plenty to give you more than 60 FPS in many recent games, even at high settings. You could spend less on the processor or on the graphics card and still get 60 FPS in current games, but this build is more future-proof — at the very least, it should allow you to play the latest games over the next couple of years.
Since games tend to eat up a ton of disk space, we didn’t bother saving money on a cheaper 500 GB drive. You won’t enjoy uninstalling and reinstalling games because you’re always running out of space. The 1 TB disk we chose is not the fastest on the market, but 2 Gbps should be enough to quickly load up most games.
Budget: $1,600
CPU: Intel 10600k (6 cores, 4.8 GHz): ~$290
RAM: G.SKILL F4-3600C19D-16GVRB Ripjaws V: ~$75
Cooler: Cooler Master ML240 liquid cooler: ~$80
Motherboard: GIGABYTE Z490 VISION G: ~$200
Graphics card: EVGA GeForce 2060 Super: ~$425
Hard drive: Samsung 970 Evo: ~$180
Power supply: EVGA 700 BR: ~$100
Case: Thermaltake View: ~$180
Total cost: ~$1,530
Moving up the food chain: For a super smooth frame rate at QHD (2560 x 1440), you’ll need more CPU and GPU power. For that, we go to Intel, as their processors are clocked higher than their AMDs counterparts.
In our tests, a 2060 Super GPU combined with a fast Intel CPU delivered an astounding 90 FPS on average across the 10 different games we tested. Fortnite, Wolfenstein: Youngblood, and Grand Theft Auto V delivered more than 100 FPS with this card. Just two or three years ago, that kind of performance would’ve set you back $3,000!
On the hard drive side, we went with a faster 1 TB Samsung 970 Evo.
Budget: $3,300
CPU: Intel 10900k (10 cores, 5.2 GHz): ~$760
RAM: G.Skill Royal Z 4266 MHz RAM: ~$370
GPU: EVGA GeForce 2080 Ti: ~$1,150
Cooler: Thermaltake 360 RGB Sync: ~$160
Motherboard: MSI Z490 Meg Ace: ~$390
Power supply: EVGA SuperNOVA 1200 P2: ~$320
Case: Fractal Design Define R7: ~$150
Total cost: ~$3,300
Those components essentially match the PC I built when writing this article. The PC was built from the ground up to deliver a smooth experience in 4K resolution with the highest detail.
First, we’re moving up to an Intel Core i9 10900k, which boasts 10 cores at up to 5.2 GHz. It’s Intel’s current flagship gaming CPU. While it doesn’t offer the multimedia or productivity performance of the AMD Ryzen (which offers even more cores), its high clock rate gives it a real edge in gaming.
On the RAM side, we’ve moved to super-fast 4266 MHz sticks, and we’re recommending the leading GPU: the mighty 2080 Ti.
To keep everything cool, we’re using a 360mm Thermaltake liquid cooler. Paired with a sleek Fractal Design case, it’s everything a gamer wants.
Find a spacious, well-lit spot where you can spread out all your components. In my case, this was the kitchen counter, but I’m sure you can find a better spot. Oddly enough, the only real tool I needed was a regular screwdriver, but you might want to prepare yourself, as some components and cases could be harder to deal with. Here’s what you need:
Anti-static pad and gloves: Just by walking around on the floor (especially if it’s carpeted) you accumulate static electricity. Touching components like a motherboard or GPU could possibly damage its components, but an anti-static pad will remove this danger.
Your anti-static pad will also prevent any scratches or dents when handling your equipment. I put my equipment on a larger, anti-static microfiber blanket. Also recommended are anti-static gloves to fully prevent any form of discharge. You can easily get them at Amazon, Newegg, or your favorite local retailer.
Screwdrivers: If you don’t already have all the screwdrivers you need in your household, pick up a standard screwdriver set.
Thermal paste: You need to apply this paste to your CPU before attaching the cooler (more on that below). However, some coolers (such as the Thermaltake 360 RGB I bought for my build) already have some thermal paste applied.
Now that you’ve purchased the components, let’s get your beast ready. Here’s a step-by-step guide for building a gaming PC:
Usually, the case comes mostly assembled in the box, and there’s not much you need to do other than installing the components.
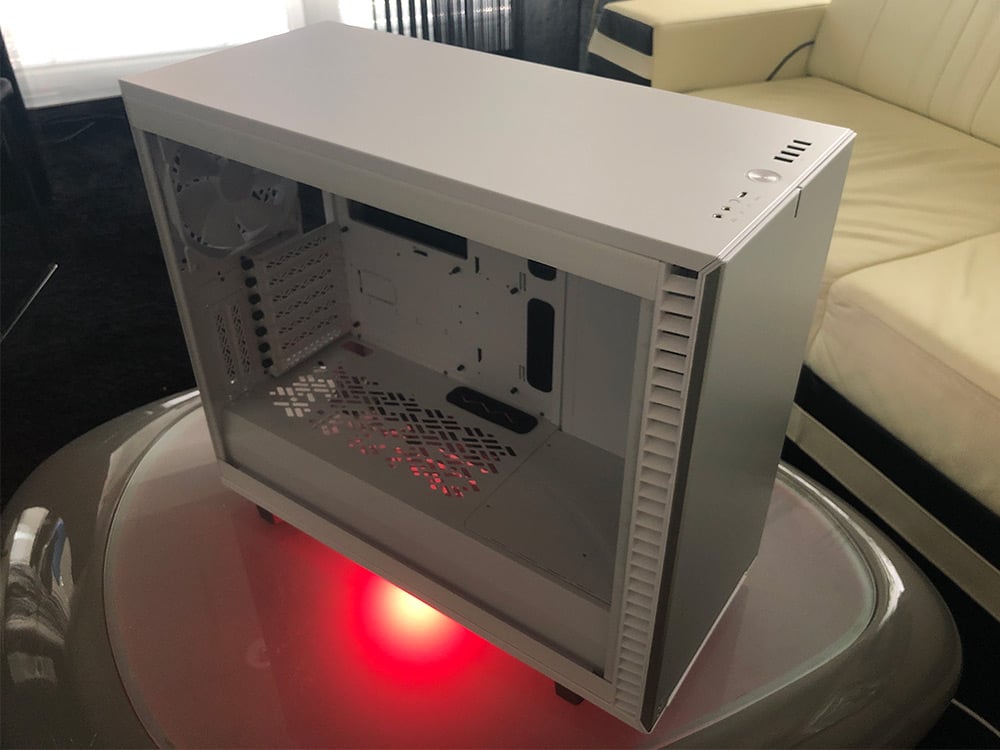 Getting the case ready.
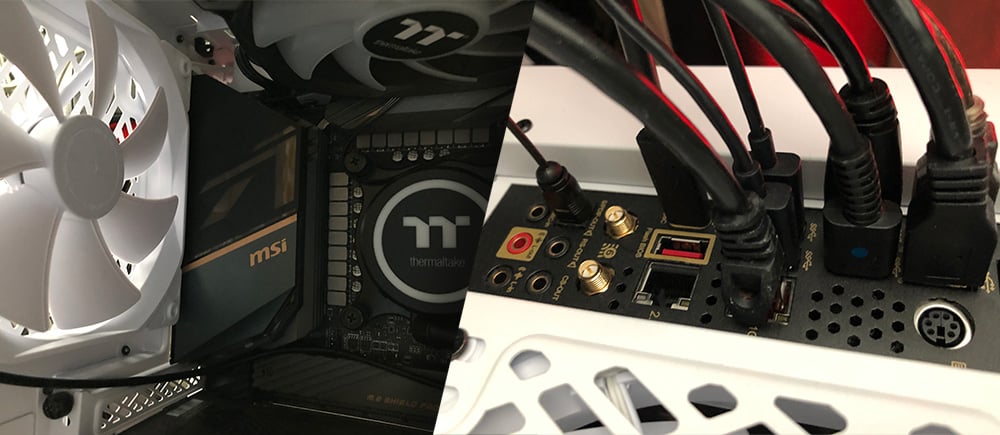
The case I used needed some cabling. See the USB ports and power button at the top? That required me to put in a cable and lead it through the backside in order to connect it to the motherboard.
You’ll also need to remove the slot covers on the backside to fit the graphics card in. If you’ve purchased extra fans, this is a good time to put them in.
Don’t put in the motherboard just yet. You’ll want to install the processor and memory first. At any rate, get all the cables ready.
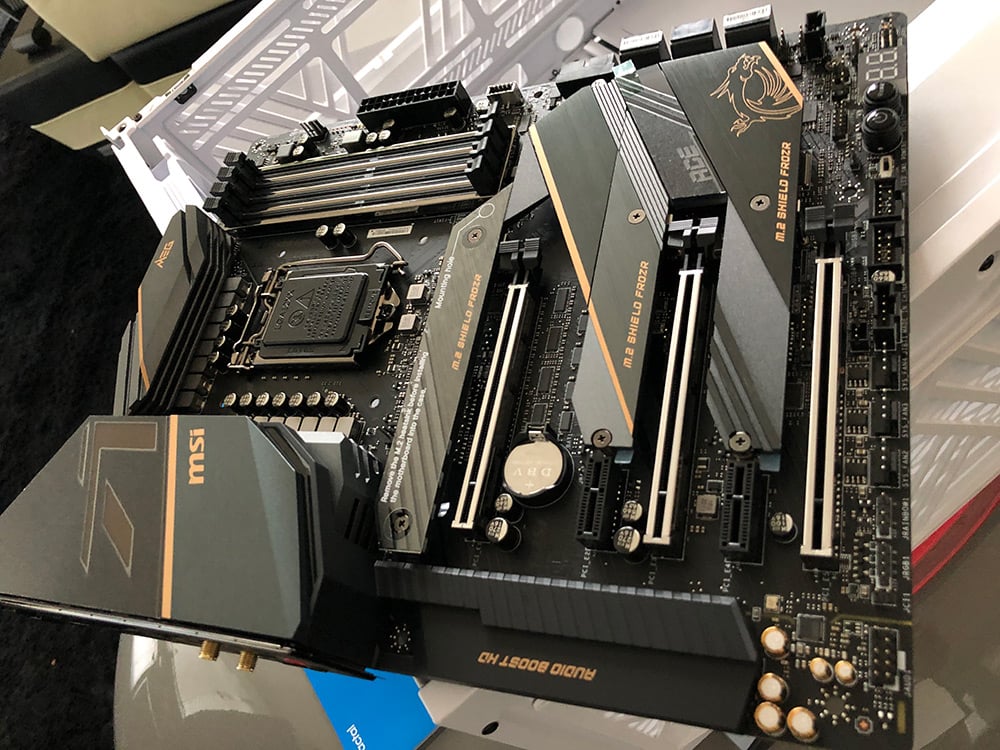 A MSI Meg Z490 motherboard.
Open the lid on your motherboard and insert your CPU. You’ll see that it has some little notches on each side to help you find the right angle.
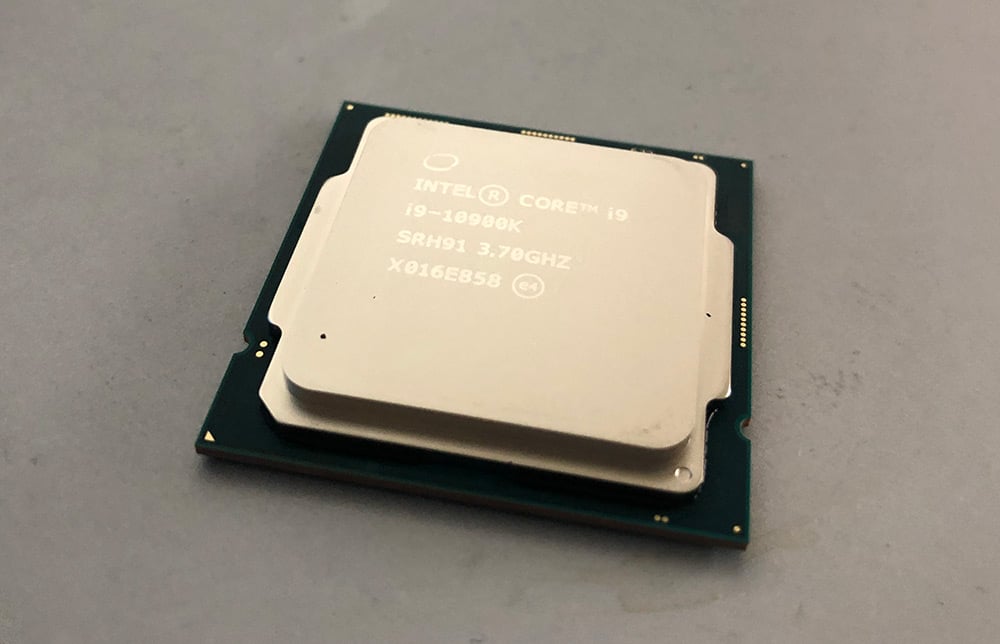 An Intel Core i9 10900k CPU.
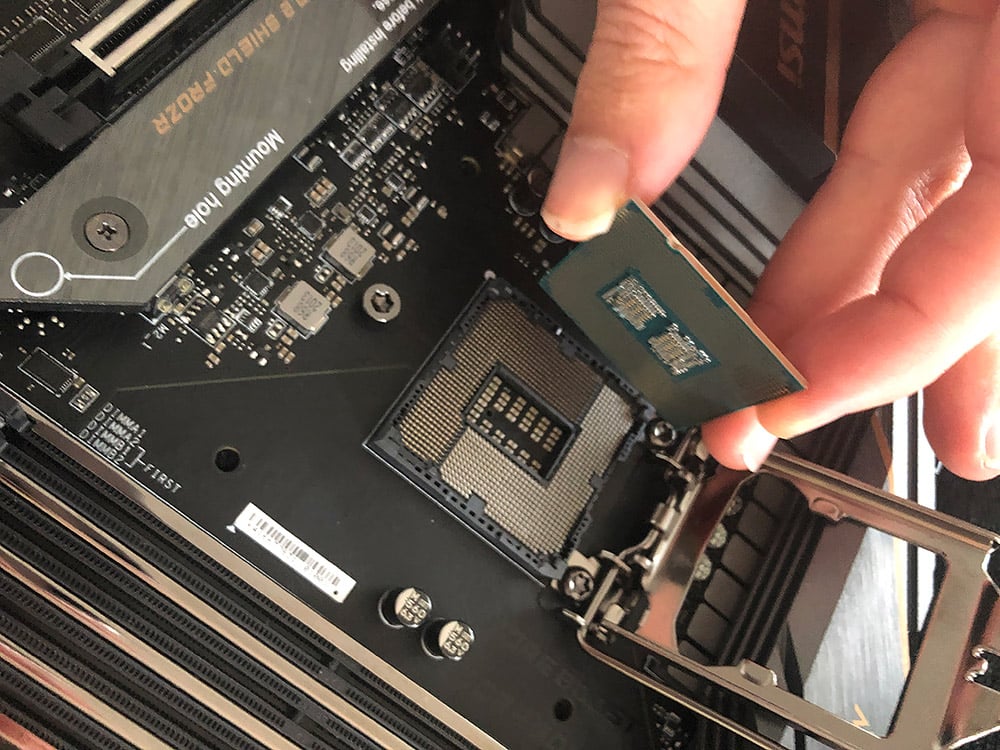 Inserting the CPU.
Since we’re recommending Thermaltake coolers for our builds, I can safely point you to their user manuals. Head to the downloads section of Thermaltake’s website, select User Manual on the left, and pick your product category and model from the lists. These manuals are quite handy and help you connect all the cables correctly. It’s not that hard of a job, but might require some fiddling.
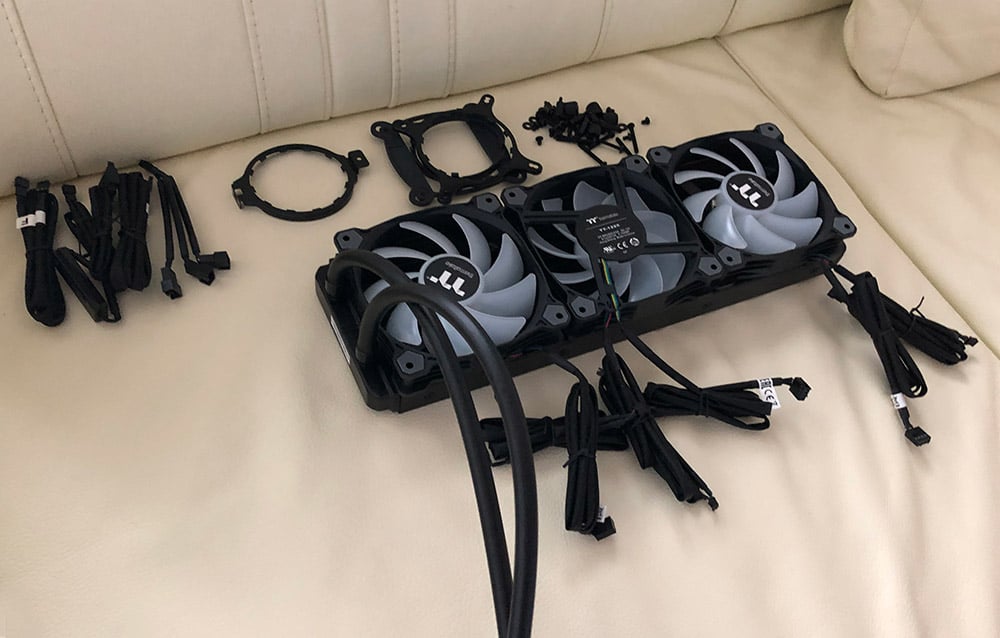 Assembling the liquid cooler.
Make sure you’re using the right pieces for the right processor, as AMD and Intel units have different sizes and shapes.
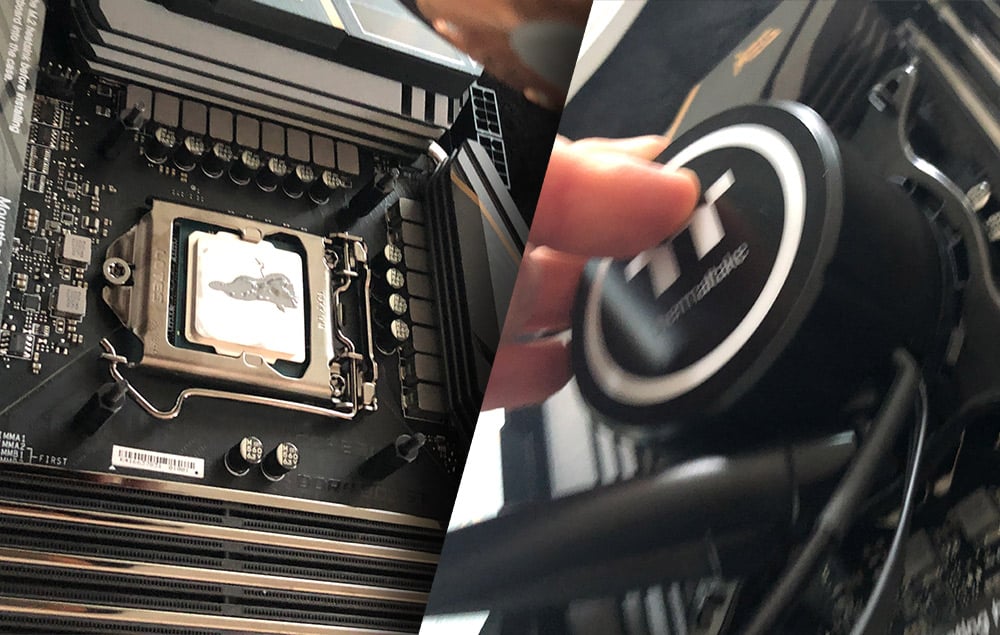
Let’s put some thermal paste on that processor:
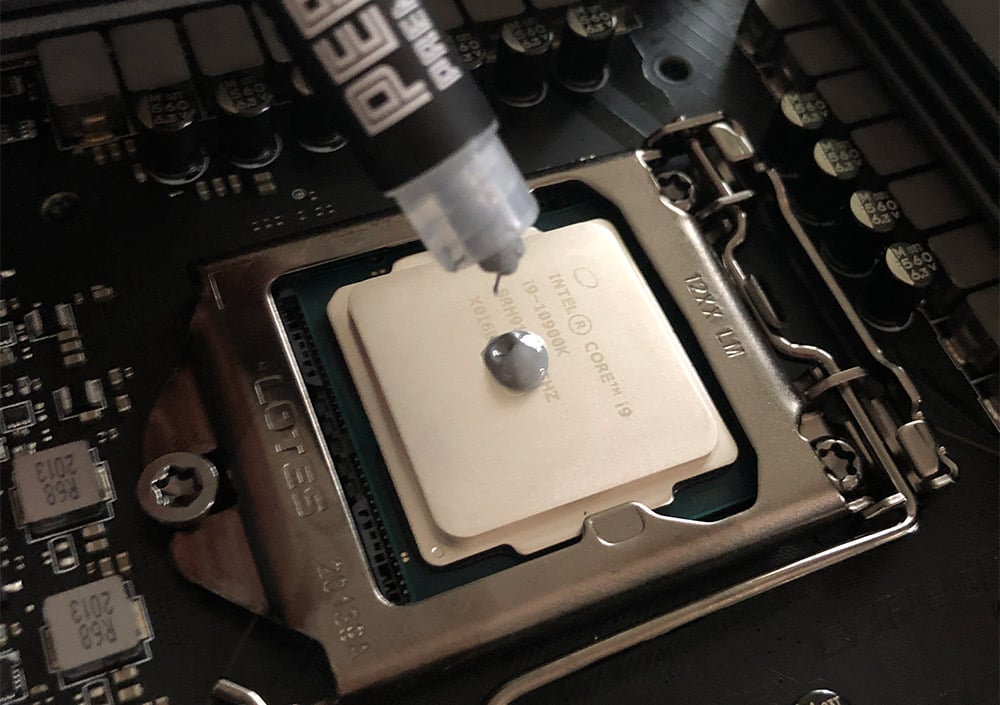 Applying thermal paste to a CPU.
Screw your liquid cooler in tight from the backside of your motherboard, making sure nothing is loose. Then connect the FAN and PUMP cables to the corresponding ports on your motherboard.
 Installing a liquid cooler into a PC
If you have two RAM modules, put them in the A2 and B2 slots. If you have only one, put it in the A1 slot. Grip your RAM module or modules by the sides, and do not touch the gold connectors.
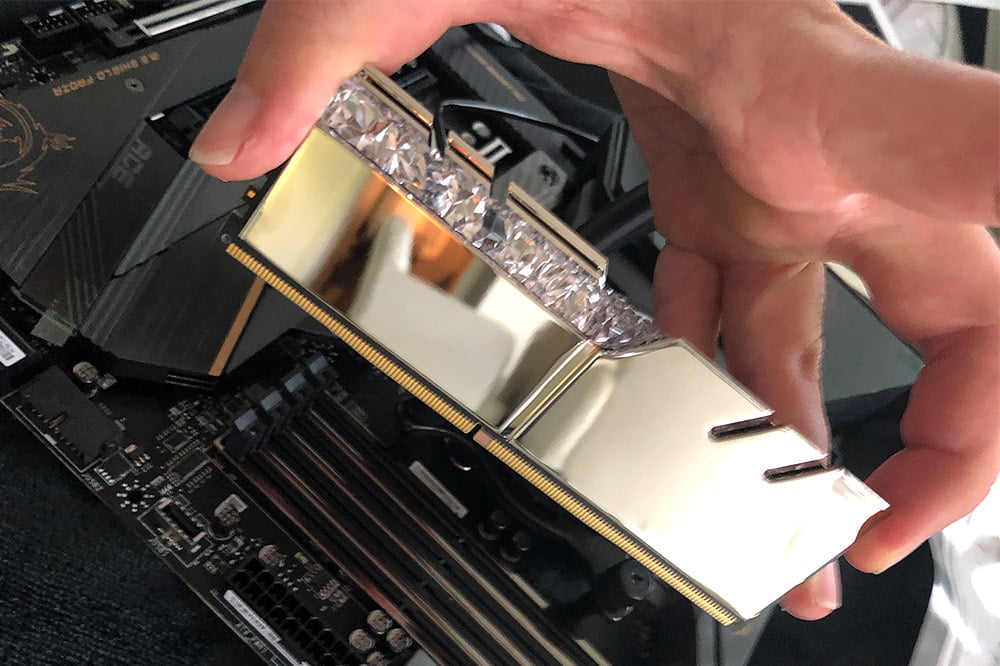 Inserting RAM into the motherboard of a PC — be careful not to touch the gold connectors!
See the little slot where it says “M2”? This is where you need to plug in your tiny new SSD hard disk. On my motherboard, this was covered by a heat dissipator. Other than that, it’s not much different than plugging in a thumb drive.
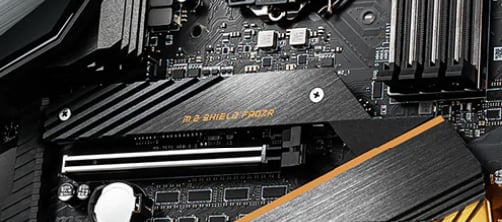
Installing a NVME SSD into the motherboard of a PC.
Put the motherboard into your case and screw it in tight. See the ports on one side? Align them with the openings in your case.
 Inserting the motherboard into a PC case, with all the ports correctly aligned.
At the same time, install the water cooler on either the top or the bottom side of your case. In my example, it goes on the top.
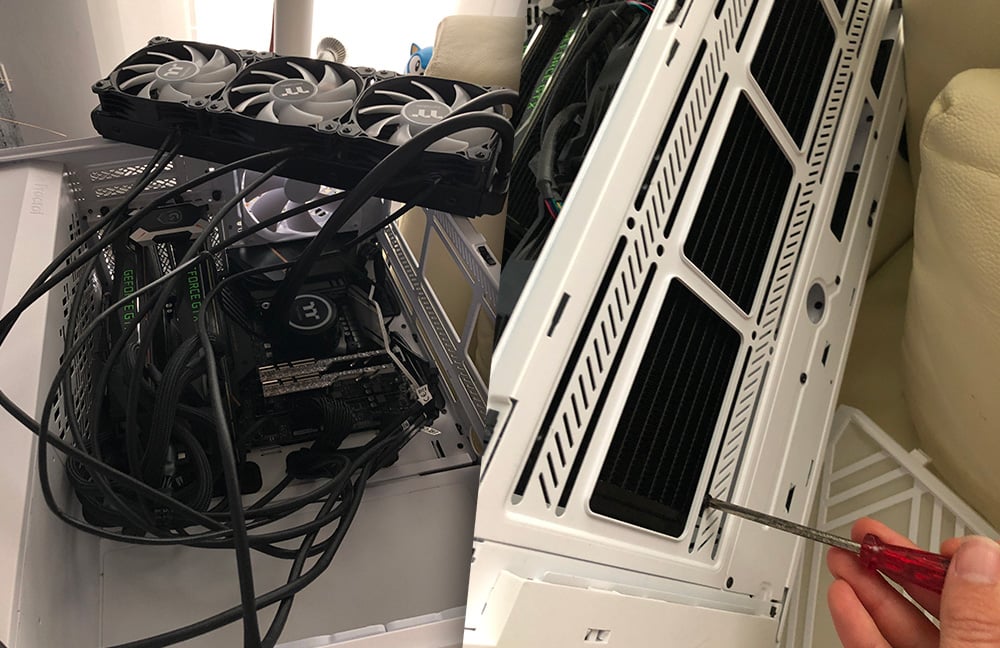 Installing the liquid cooler and screwing it into the case.
This was the trickiest part for me, because liquid coolers tend to have extremely long cables for lighting and operating the fan. Luckily, I was able to feed them through the backside of my case.
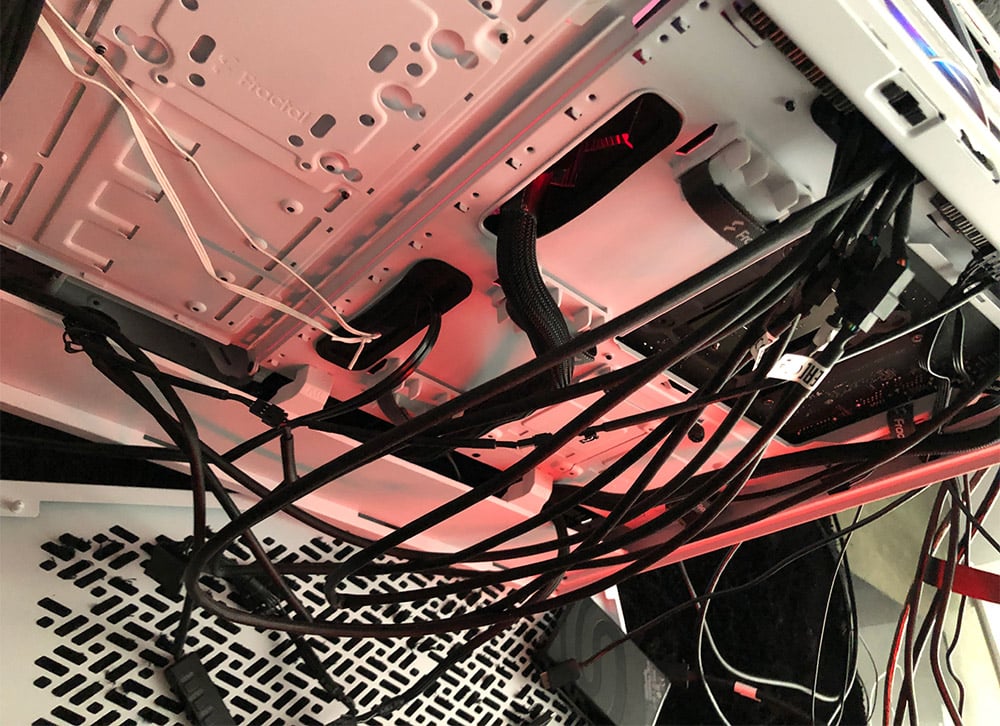 A PC case with cooling cables coming out of the back.
This is where cable ties come in handy to make even the backside of your custom-built machine nice and clean. You shouldn’t do what I did at this stage, simply stuffing it back there and covering it up with the case's side plate. That’s like brushing dust under your carpet. (Don’t worry, I went back later to fix it!)
Now, insert the power supply and hook up the main connector to the motherboard. It’s the largest of the bunch.
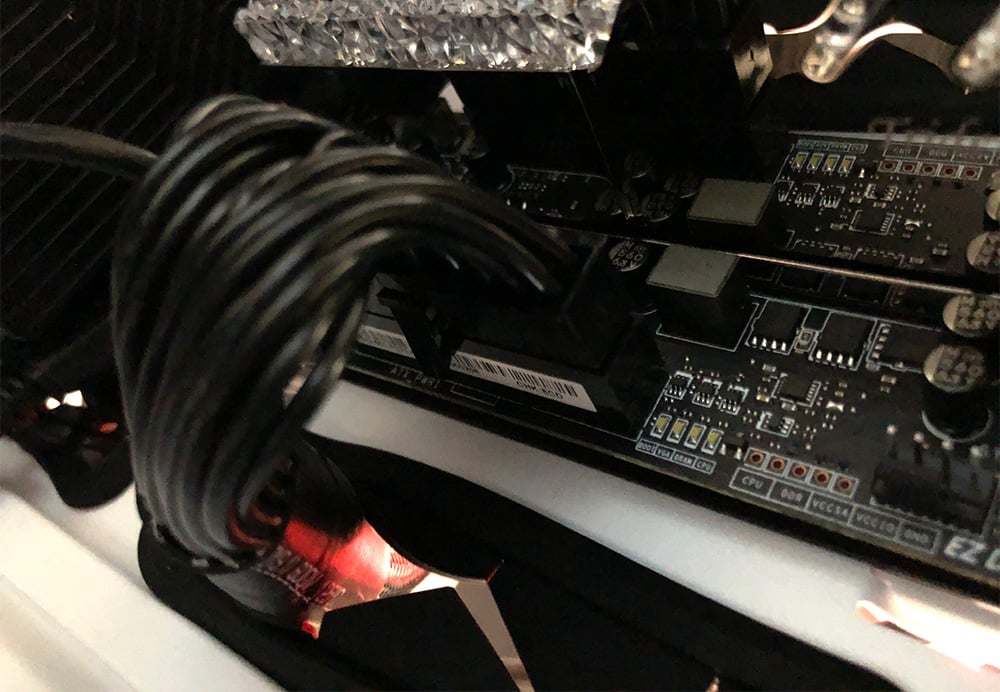 Plugging in the power supply for a new PC.
Now we’ll install the graphics card. See the three or four wide slots on your mainboard? Gently put in your graphics card so that the pins align and give it a firm push when it’s almost in. There’s a little hatch that will snap into place.
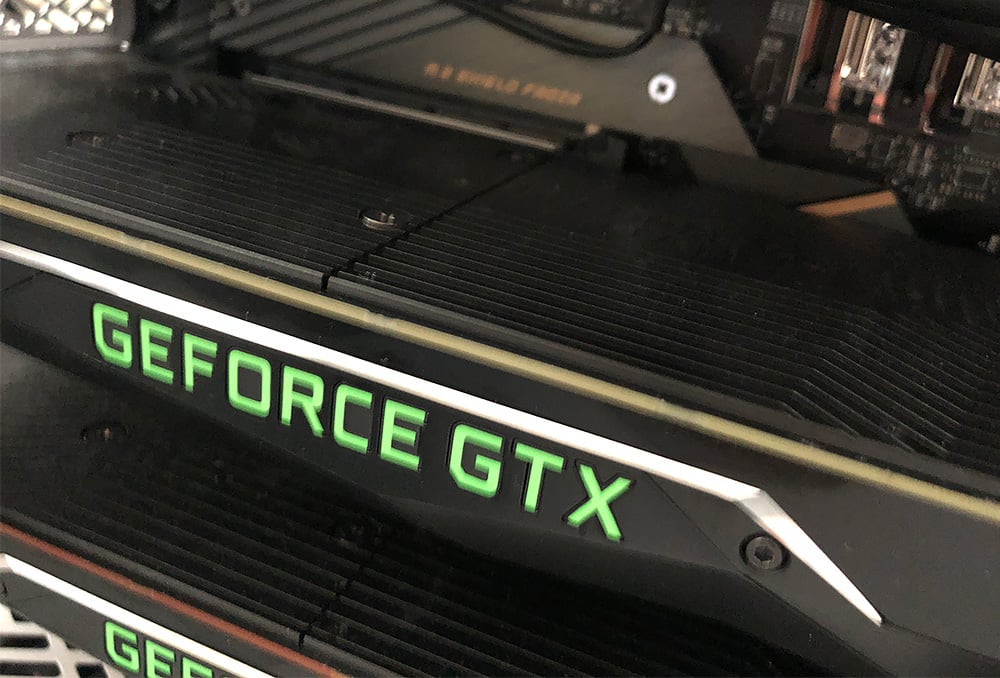 An NVIDIA GeForce GTX graphics card inserted into a motherboard.
Then, hook it up using one of the VGA power cables that came with your power supply.
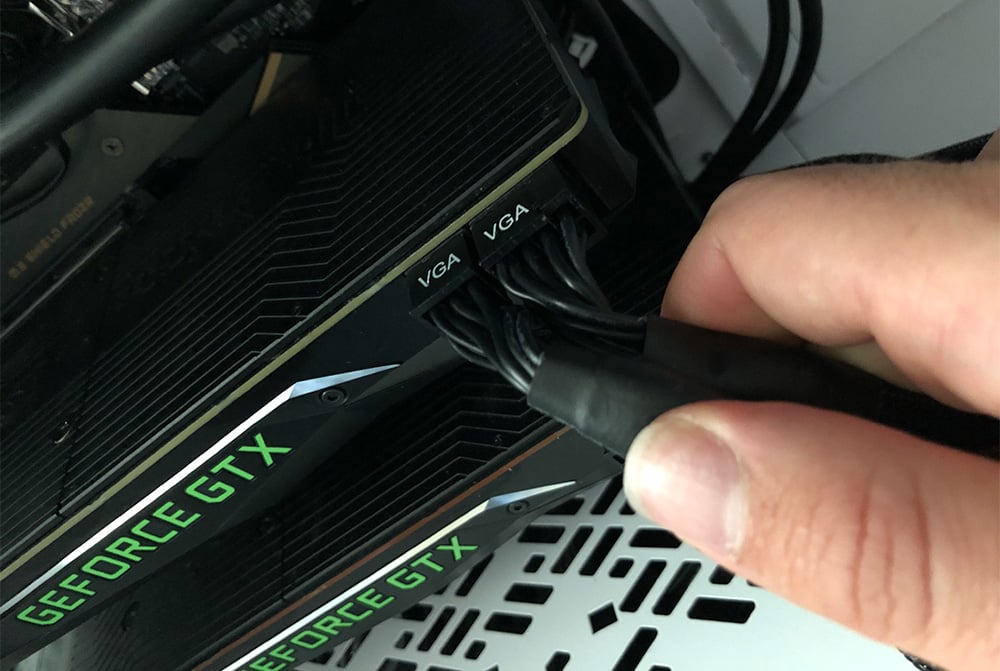 Hooking up power cables to the graphics card.
Ok, this should be it! Ready for the big moment? Plug in the HDMI or Displayport cable of your display, your mouse and keyboard via USB, and the power cable for your PC. For the first boot, plug in only what you really need.
Hit the POWER button and...pray...that you’ve connected everything properly! No worries, though — if something is not correctly connected, your motherboard will simply shut down the system, or stop any operations to display an error code and prevent real damage.
Have you just tried to turn on your PC for the first time but nothing happened? Is the screen still black? Now comes the tough part: figuring out what’s wrong!
While my current gaming rig turned on the first time — and to be honest, I was surprised that it did — gaming PCs I've built in the past weren’t quite so cooperative. Here’s what I did in response.
Connect your mouse, keyboard, and display. Nothing else. Any USB drive could prevent your system from booting.
Your new PC might boot up in a display resolution that’s not supported by your screen, especially if you’re connected to a TV or projector. Connect it to a regular display.
Make sure you plugged in all the right cables. Then, unplug and reconnect them all again. Also make sure that your liquid cooler is working properly — you should hear a gushing sound when turning it on for the first few times.
Modern mainboards come with small displays that show the current temperature or, if there’s a problem, an error code. Check your manual to find out what a given error code means. You can find your manual in the box or, if you’ve thrown it away, on the web.
If you don’t understand what an error code means, look it up online. Chances are that someone else has already asked that question.
Some motherboards don’t have displays, and they’ll signal errors as a beep or series of beeps. Listen for these and note the length of each beep. For example, a sequence of two short beeps and a long beep might indicate a memory error.
Sometimes you need to completely reset the BIOS back to its default or safe settings. Some motherboards include a special “jumper” on the motherboard for this purpose. Others have a dedicated button that states “Clear CMOS.”
If you still can’t figure it out, try removing some of the components. Start with the graphics card and try swapping it out for another one. Do the same for RAM. If that fails, you may need to try a different processor. It’s a lot of work, but in some cases, there are no other options.
Your new PC will run extremely fast from the get go, but our advice would be not to bog it down with too many programs. Even modern gaming rigs can start to stutter when programs start doing extensive work in the background. Clean up your PC to prevent this from happening.
Better yet, install Avast Cleanup and enable its built-in Automatic Maintenance feature. You can use the built-in Disk Cleaner to preserve more space for games. And the Sleep Mode feature will put other apps to sleep.
So, why should I build my own PC? Can’t I just buy one from the likes of Alienware, HP, or Lenovo? The answer is: Sure you can! But you’ll likely spend more on a pre-built PC, and you won’t have as many choices regarding what goes inside it.
Many online shops let you choose among a handful of processors, three to four configurations of different RAM modules, and a variety of graphics cards. Building your own PC gives you the freedom to build whatever you want. It’s yours.
Building a gaming PC isn’t an easy job. I’ve spent months researching the right components, and my recommendations here are based on my own experience, and I’m hoping that I’ll have saved you some time.
Be prepared to spend half a day or more putting your PC together, and even longer if you run into any problems. But by following this guide, you should be well on your way to building the gaming PC of your dreams.