- Security
- Privacy
- Performance
Splitting your screen lets you multitask by displaying two or more windows side by side, boosting productivity and managing multiple tasks easily. Learn some of the best ways to handle splitting your screen on Windows. Then, get Avast Cleanup to support your screen split experience, optimizing your system, clearing junk, and updating software automatically to help your computer keep up with your multitasking needs.

This Article Contains
This Article Contains
Split screen is a Windows feature that helps you work more efficiently by making multitasking easier – whether you’re comparing documents, following a tutorial and taking notes, or chatting while browsing.
Keep in mind, this feature can be turned off in your system settings, so if it’s not working, check out our troubleshooting tips for solutions.
Split your screen by dragging and resizing windows
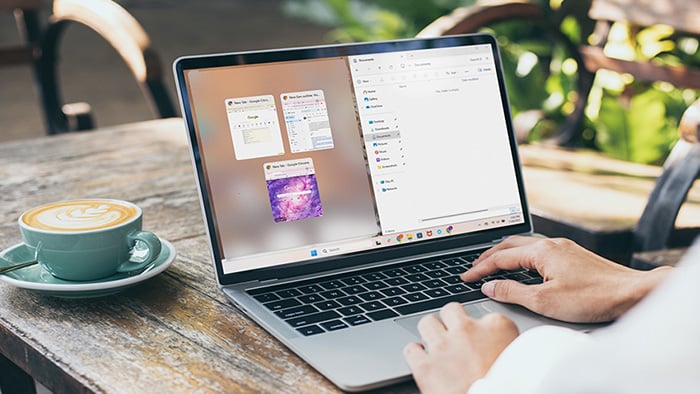
The easiest way to split your screen in Windows 10 or Windows 11 is by simply dragging one window to the left edge of the screen and another to the right edge. This built-in feature is called Snap Assist and makes multitasking easier — without the need for keyboard shortcuts.
It’s an ideal setup for reading and writing, comparing documents, or using two apps at once. Here’s how to do it using the drag-and-snap method:
-
With two or more windows open, click and hold the title bar at the top of the first window you want to use.
-
Drag that window to the far left or right edge of your screen. When you see a transparent outline, release the mouse, and Windows will resize that window to fill exactly half of the screen.

-
Once the first window snaps into place, Snap Assist will show thumbnails of your other open windows. Click another window to fill the other half of the screen.

-
You can now resize the split by dragging the divider between the two windows left or right. This lets you give more space to whichever app needs it most.
This drag-and-snap method is a user-friendly way to get more done on a single screen, but it’s not the only way to split your screen. Keep reading to find out how to screen split using other methods, like keyboard commands.
Split your screen on Windows with keyboard shortcuts
Windows 10 and 11 both support a range of keyboard shortcuts that let you instantly snap windows to the sides of your screen — no mouse movements needed.
Here are the relevant keyboard shortcuts to split your screen on Windows, with an explanation of what each one does:
-
Windows key + Right arrow: Snap the current window to the right half of the screen.
-
Windows key + Left arrow: Snap the window to the left half.
-
Windows key + Up arrow: Move the window to the top half.
-
Windows key + Down arrow: Minimize the window.
These Windows split screen shortcuts are a great way to organize your workspace quickly. And, for even better organization, Windows also lets you create multiple virtual desktops.
This feature is different from split screen — instead of arranging windows on one screen, you can create entirely separate desktops for different tasks. For example, you could have one layout for work, another for entertainment, and another for studying. It’s a smart way to declutter your workspace without closing or losing anything.
Here’s how to create and manage virtual desktops with keyboard shortcuts:
-
Windows key + Ctrl + D: Create a new virtual desktop.
-
Windows key + Ctrl + Left/Right Arrow: Switch between virtual desktops.
Split your screen on Windows 11 with Snap Layouts
If you're using Windows 11, there's another way to split your screen. The feature is called Snap Layouts, and it’s designed to help you organize your computer’s open apps and windows with even more flexibility (up to six windows, depending on your screen size and resolution).
For example, imagine you're on a call. You could organize split windows to see four windows open at once and:
-
Keep the video call open in the top-right window.
-
Open a Word document in the top-left window to take notes.
-
Place a spreadsheet in the bottom-right window.
-
Snap your web browser to the bottom-left window.
You can access Snap Layouts by hovering your cursor over the maximize button in the title bar of an open window or by pressing Windows key + Z. You’ll see a range of layout options for your current screen — a variety of grids made up of two, three, four, and six windows.

How to use Snap Layouts (step-by-step)
-
Open the apps you want to use.
-
Press Windows key + Z to bring up Snap Layouts.

-
Click a layout zone (e.g., top-left of a four-part grid) and Windows will snap that window into place.

-
Select additional apps to fill the remaining spots.

Once you’ve arranged your windows, you can drag the dividers to adjust their size.
This split screen feature in Windows 11 keeps everything visible and organized, improving focus and productivity without constantly switching tabs. Whether you're a student, office worker, or multitasking pro, Snap Layouts can help you use your computer more efficiently.
How to customize split screen behavior on Windows 11
You can also customize exactly how Snap behaves — like whether it shows layout suggestions or automatically resizes windows.
To adjust the settings:
-
Click the Start menu and select Settings > System > Multitasking > Snap windows.
-
Make sure the Snap windows toggle is on. Then, expand the settings menu to reveal multiple checkboxes to control how split windows will behave:
-
-
When I snap a window, suggest what I can snap next to it.
-
Show snap layouts when I hover over a window’s maximize button.
-
Show snap layouts when I drag a window to the top of my screen.
-
Show my snapped windows when I hover over taskbar apps, in Task View, and when I press Alt+Tab.
-
When I drag a window, let me snap it without dragging all the way to the screen edge.
-

How to split screen across multiple monitors
If you use more than one screen, knowing how to split screen on computer setups with multiple displays can dramatically improve your workflow.
-
Right-click anywhere on your desktop.
-
Select Display settings. Windows will open a visual layout of your connected screens, labeled 1, 2, 3, etc.
Each screen acts as an independent workspace. That means you can:
-
Use Snap Assist or Windows split screen shortcuts to organize windows on each monitor.
-
Drag windows freely between monitors.
-
Snap windows to the edge of each individual screen.
If you frequently switch desks or connect to different displays — as many workers do, especially in hot desk environments — understanding how to split a screen across monitors helps you adapt quickly. A few seconds spent adjusting your display layout could save you hours thanks to boosted productivity.
Why is split screen not working on Windows?
If split screen isn't working on your Windows PC or laptop, it could be disabled in your settings, hindered by outdated graphics drivers or an old version of the Windows operating system, incompatible with your display setup, or blocked by unsupported apps.
Here’s how to work through each potential problem:
-
Split screen is disabled: Enable split screen on Windows by going to Settings > System > Multitasking > toggle on Snap windows.
-
Outdated graphics drivers: Update your graphics drivers by going to Start > Device Manager > Display adapters > right-click your GPU > choose Update driver.
-
Outdated Windows version: Check for a Windows update by going to Settings > Update & Security (Windows 10 and earlier only) > Windows Update.
-
Display setup issues: Check for unusual scaling values (e.g. 150%+), which could stop apps snapping into place in a split screen scenario.
-
The app doesn’t support it: Some older third-party apps don’t support this feature. Try closing or disabling any such apps temporarily to test if they’re the problem.
Keep your Windows PC running like new with Avast Cleanup
If your PC or laptop feels slow, especially when multitasking or using split screen, the issue might be that over time, junk files, bloated apps, and outdated software have slowed things down. Avast Cleanup helps keep your Windows computer performing at its best so you can split windows, snap layouts, and work across multiple screens without frustration.
With Avast Cleanup, you can free up storage space by clearing out junk files, temporary data, and old downloads, optimizing your system so Windows features like Snap Assist and Snap Layouts run smoothly. Try Avast Cleanup today.
What customers say
More Performance Articles
Facebook Session Expired: Causes, Solutions, and Prevention

How to Get Your Mouse Cursor Back: 11 Tried and Tested Methods
How to Split Screens on Your PC or Laptop (Windows 10 & 11)

Your Phone Is Not Registered On a Network: What It Means and How to Fix It

Why Won't My iPhone Turn On? 6 Easy Fixes to Try

Why Your iPhone Gets So Hot and How to Fix It

Why Is My Ping So High and How to Reduce It

Why Your Keyboard Isn’t Working and How to Fix It in 6 Easy Steps

How to Right-Click on Mac With or Without a Mouse

How to Test for Packet Loss and Check Your Internet Quality

How to Fix Common Printer Problems

Why Does My Phone Keep Restarting and How Can I Fix It?
Performance Tips
Performance
Erin H Korntved
19-09-2025