- Security
- Privacy
- Performance
Most technology is user-friendly these days, but sometimes it seems like printers remain as frustrating as ever. Keep reading to learn some simple solutions to fix common printer headaches you might be having. Then, download driver updater software to help keep your printer and other devices running smoothly.

This Article Contains
This Article Contains
Resolve physical issues
The best approach to troubleshooting printer problems is to start simple to catch the most basic and commonplace snags. Then work your way up to more complex issues if necessary. First, let’s look at how to fix physical connection and supply issues for a printer that’s not responding.
Check USB and power connections
The simplest “printer offline” fix is to ensure all the necessary power and USB connections are hooked up properly.
-
Confirm your power is connected and turned on.
-
If you have a power brick, check if the light on the power brick is on. If the light is off, check if the cord to the power brick is connected. If your power’s on and the power brick’s connected, but the light on the brick’s still off, your power brick may need replacing.
-
If you have a wired printer, check that the USB cord is securely connected to both the printer and your computer.
-
Turn your printer and computer off and then on again to reset and recalibrate the connection.
To fix HP printer power supply problems, check out HP’s official power supply guidance.
Check for paper jams
Why is your printer not printing even though it’s connected? Paper jams may be the reason. If you find a paper jam, try to remove it from the back of the printer, rather than through the front.
The type of rear access panel differs by brand and model but here are the basic steps:
-
If you have a knob, turn it to the unlocked position to open or remove the panel. If you have an access tab, press it down to flip open or remove the panel. If you have a removable module, either pinch the tabs of the module together or press the buttons on either side of the module to remove it and gain rear access
-
Slowly pull out the jammed paper.
-
Carefully clear out any torn bits of paper that remain.
-
Replace or close the rear access panel, or snap the rear access module back in place.
-
Print a test page and see if it works.
Clean the printhead
The printhead is what houses your ink cartridges. So, why does your printer keep saying a cartridge problem is occurring when they seem fine? A common problem is dried ink buildup on the printhead, and this applies to all brands from HP to Canon.
Cleaning your printhead may be all that’s needed to get things moving again.
How to clean your printhead through your printer’s self-cleaning tool
-
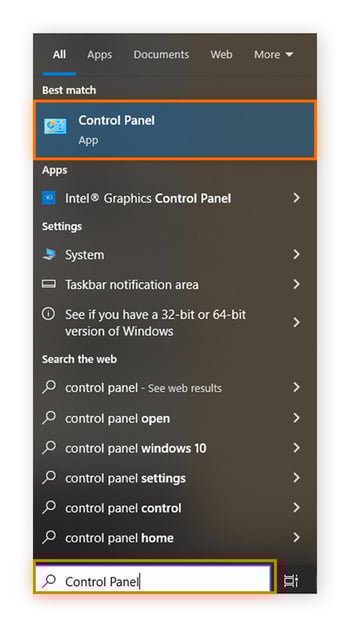
Type control panel in the Windows search bar and open it when it appears.
-
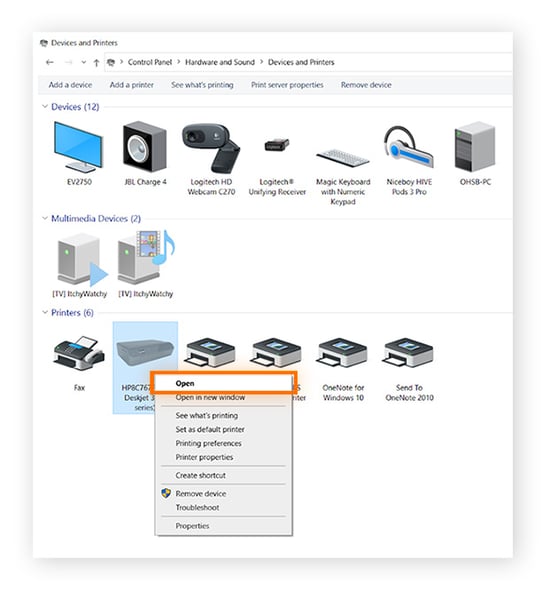
Select View device and printers.

-
Right-click the printer whose printhead you want to clean and click Open on the pop-up menu.
-
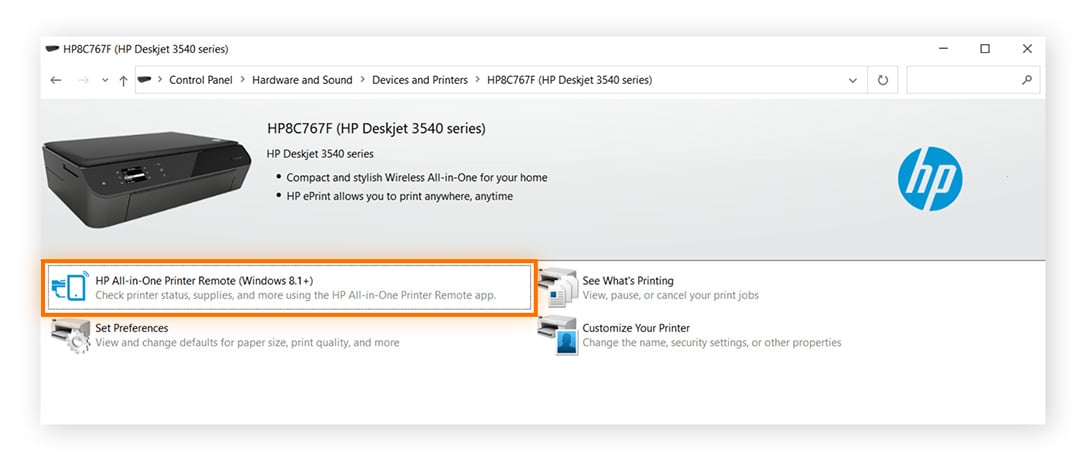
Double-click the relevant icon to launch your printer management app.
-
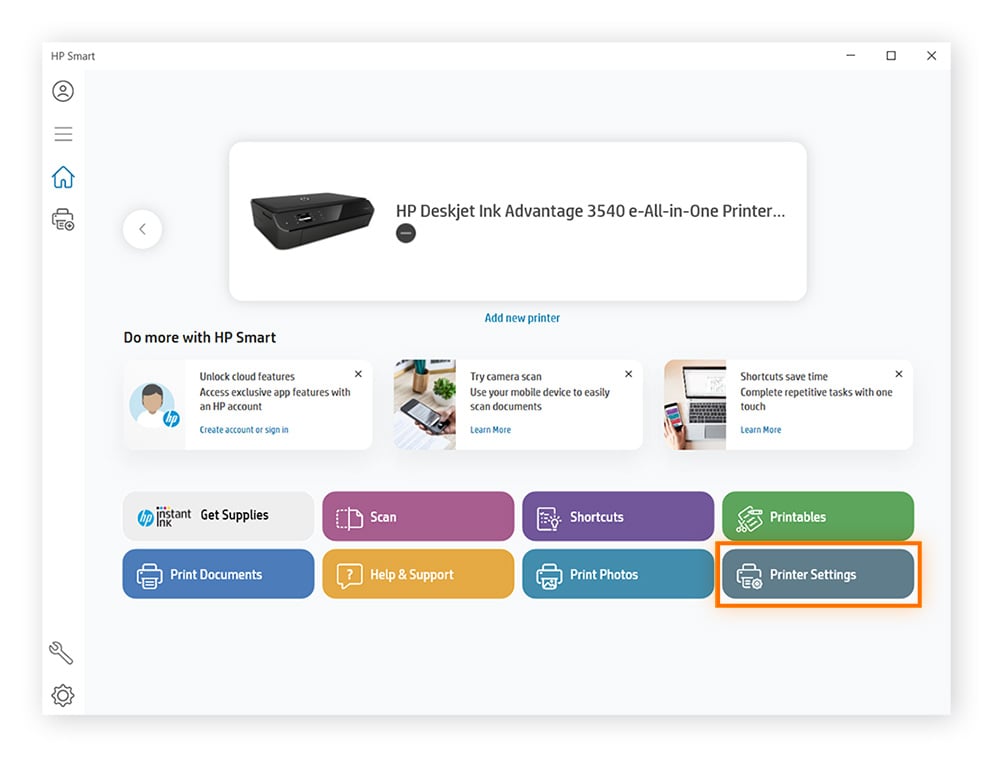
Click the Printer Settings (or similar) option.
-
Find the Clean Printheads option (often listed under “Print Quality Tools”) and follow the on-screen prompts.
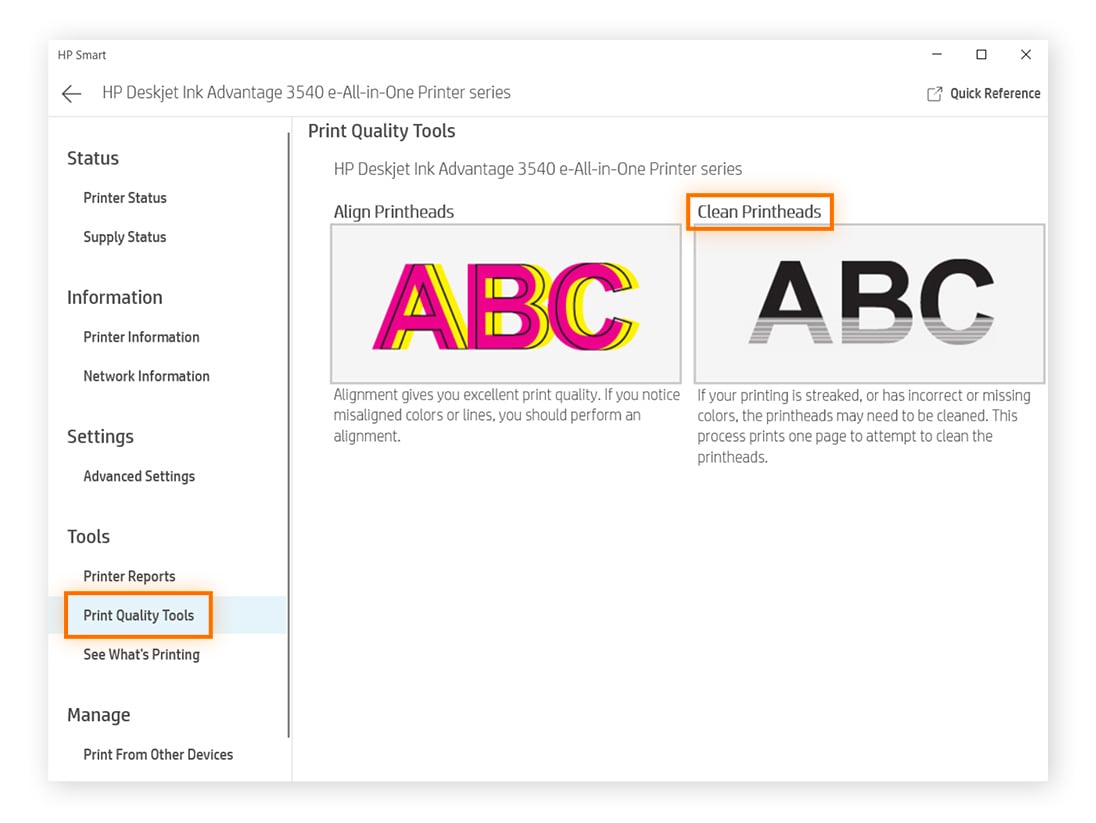
The process will take a few minutes. With an HP printer, a test page option should be available — print a test page to see if it works.
You may be able to clean your printhead from a Mac, too. Look up the instructions for your specific printer and macOS.
If there’s no self-cleaning option for your printer on Windows or Mac, you’ll need to remove and clean the printhead manually.
How to remove and clean the printhead
-
Open the ink carriage access door. Let the ink carriage move to the center.
-
Unplug the printer.
-
Remove the cartridges and lay them on some paper towels.
-
Remove the printhead by pulling the release bar or releasing the latch, depending on your printer.
-
Soak your printhead in the printhead cleaner.
-
Wait at least half an hour, or up to 12 hours if the ink buildup is severe.
-
Remove the printhead. Let the printhead completely dry.
-
Place the printhead back into the printer, replace the cartridges, and power your printer back on.
Identify error codes
It’s connected, unclogged, and clean, so why is your printer still not printing? Error message codes can offer an insight into your specific printer error.
For example, you usually get an 0x8007007e error on Windows when software and drivers aren’t compatible. In this case, make sure your version of Windows is current and update your drivers.
Below are common error codes for HP, Brother, Epson, and Canon printers.
Common HP printer error codes
-
Error code 02 means there are problems with the driver or printer cable. Update your drivers and turn the printer off and on.
-
Error code 10 means the printer can’t read a toner cartridge. Reinstall the toner cartridge and reset the printer.
-
Error code 11 means your printer is out of paper. Add sheets to the paper tray.
-
Error code 13 means there’s a paper jam. Follow the guidance on the printer screen.
-
Error code 16 means low or empty toner.
-
Error code 22 means the computer and printer can’t communicate. Confirm the cable is connected or try connecting a different way.
-
Error code 24 means the printer has too many print jobs. Quit active print tasks to help resolve the issue.
Common codes for Brother printer problems
-
Error code E51 means the laser beam is not being detected. Switch the printer off and on.
-
Error code E54 indicates a main motor malfunction. Switch the printer off and on.
-
Error code E60 means fan malfunction. Switch the printer off and on.
-
Error codes 26-29 means the printer cannot detect one of the ink cartridges.
-
Error code 74 means low toner. Refill toner and try again.
-
Error code 84 means a paper jam in the body of the machine. Remove any obstructing paper.
For more Brother printer problems, go to the Brother printer troubleshooting page.
Common Epson printer problems and solutions
-
Error codes I-01 and W-05 mean the printer is out of paper, or multiple pages have been fed. Reload paper, or load more paper, then press the start button.
-
Error codes W-02 and W-03 means there’s a paper jam. Locate the jam and carefully remove the paper.
-
Error code W-04 means that you should open and close the cartridge cover, then press the start button.
-
Error codes W-10, W-11, W-13, and W-41 mean empty or incorrectly installed ink cartridges. The cartridges should be replaced.
-
Error code I-11 means that no memory card is inserted in the printer. Insert a memory card.
Another problem your Epson printer might experience is horizontal lines running through a printout. To fix this or search for other specific Epson printer problems and solutions, use the Epson support page.
Common Canon printer error codes
-
Error codes E13 and E16, 1686, and 1688 mean there’s low or empty ink. Replace the ink cartridges.
-
Error code E05 means the error is caused by the printhead not being installed, or installed incorrectly. Reinstall it.
-
Error code E14 means the error is caused by the ink cartridge not being supported by the printer, or being from a different region than the main printer. Check your cartridge.
-
Error code E15 means the ink cartridge isn't recognized. Lift the cover of the printer and make sure the ink cartridge is inserted.
For more solutions, go to the Canon printer problems troubleshooting page, then choose “printers” and your model.
Resolve software issues
Some common and relatively benign software issues can make your printer go haywire. The most common are Wi-Fi connection interference, the printer not being set as the default, the print queue, and the print spooler.
Check Wi-Fi connection
If you have a wireless printer, your Wi-Fi settings could be interfering with the communication between your computer and your printer.
Turn on Printer and Device Sharing on Windows
-
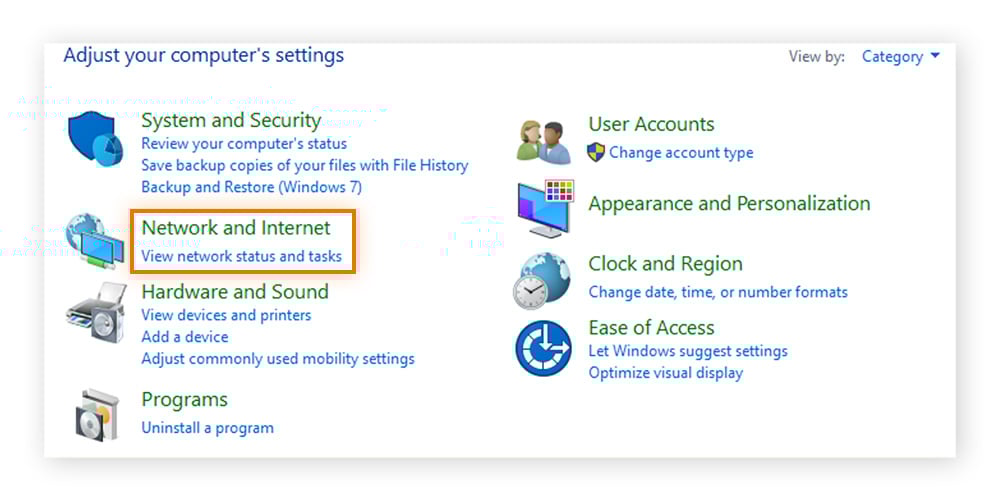
Type control panel in the Windows search bar, then open it.

-
Click Network and Internet.
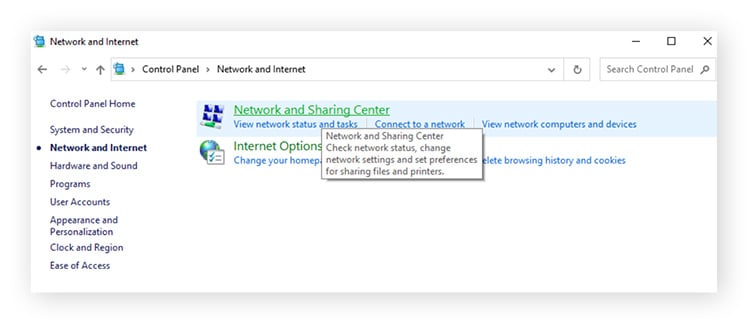
-
Click Network and Sharing Center.
-
Click Change advanced sharing settings.
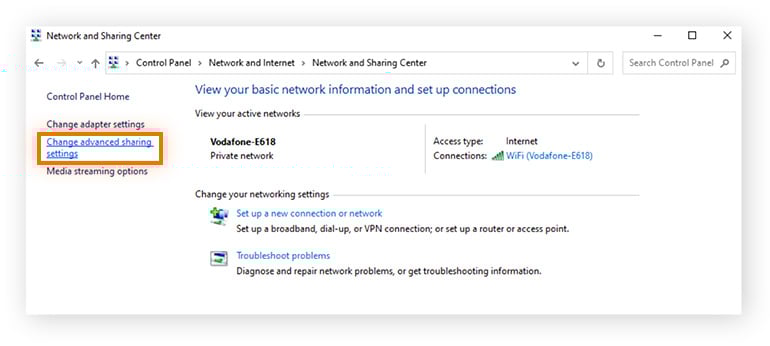
-
Under “File and print sharing,” select Turn on File on Printer sharing (or Allow others on the network to access shared files and printers on this device on Windows 11).

Another issue could be your network settings interfering. Make sure your firewall is letting your printer through. Network printer problems can also stem from your cloud security or server security settings. If you’re worried about your printer’s network security, brush up on the differences between WEP vs WPA and WPA2.
And if you have a home or office full of Internet of Things devices, look into Wi-Fi 6, which can hold more connections without getting hampered. Learning what TCP/IP is can also give you a better understanding of how all the devices on your network connect.
If you have a DNS gateway problem on an HP printer, check out HP’s official guidance for DNS issues for help.
If your Canon printer has a wireless connection problem, Canon’s wireless support page can teach you how to get a printer online again.
Check your printer's Wi-Fi connection on Mac
To connect to your Mac wirelessly, join or check the network from the printer’s interface. Follow the instructions in the manual that came with the printer or search for your make and model online.
Windows printer troubleshooter
Windows has a built-in troubleshooter for printers.
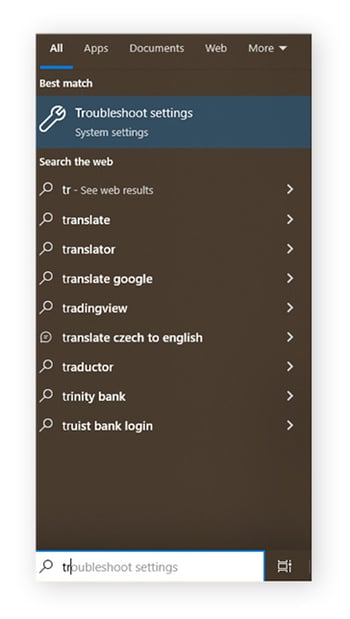
-
Search for Troubleshoot settings in Windows search, then open it.
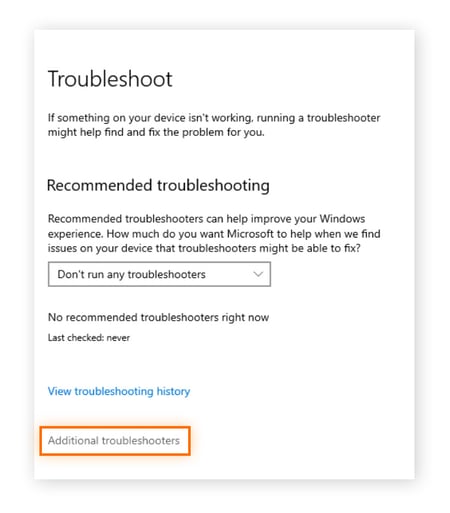
-
Select Additional troubleshooters (or Other troubleshooters on Windows 11).
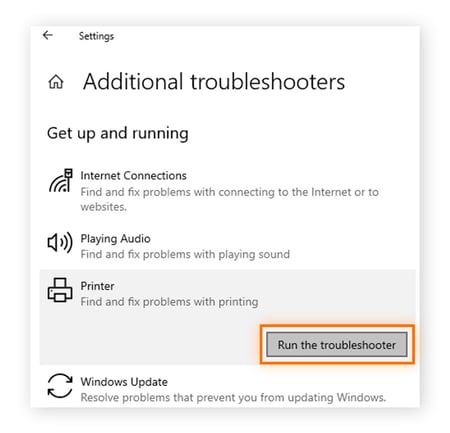
-
Select Printer, then click Run the troubleshooter (or the Run button next to Printer on Windows 11).
Windows will now run the troubleshooter to diagnose your printer problem and try to fix it.
Set printer as default
If you have multiple printers, your computer might get confused and send jobs to the wrong printer.
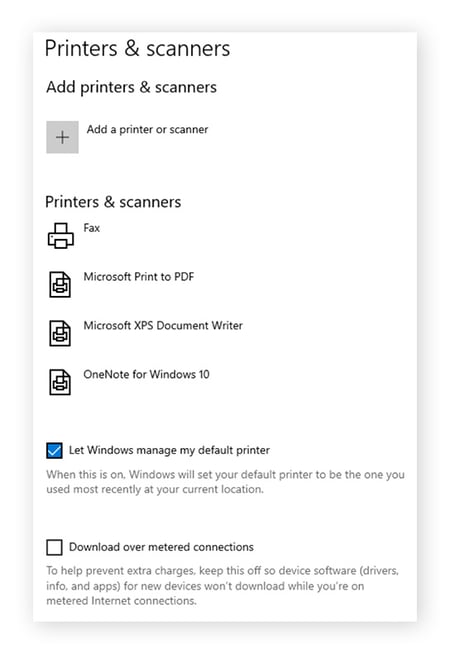
Here’s how to set a printer as default on Windows
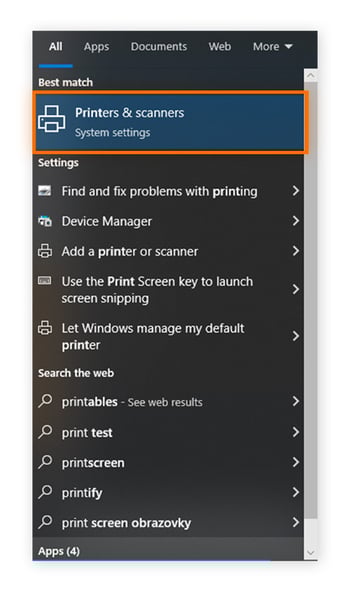
-
Type Printers and scanners in the Windows search bar and open it.
-
Check Let Windows manage my default printer, and the printer you most recently used will be the default option. If you don’t want this printer as your default, select your preferred printer, then select set as default.
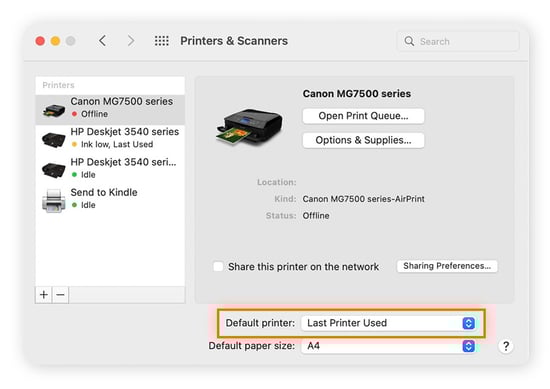
Here’s how to set a printer as default on Mac
-
Open the Apple menu, then click System preferences (or System settings in Ventura).

-
Click the arrow next to Default printer.
-
Choose a printer from the list.

Clear the print queue
If too many print jobs are queued up, your printer might get overwhelmed. Try giving your printer a fresh start by clearing the print queue.
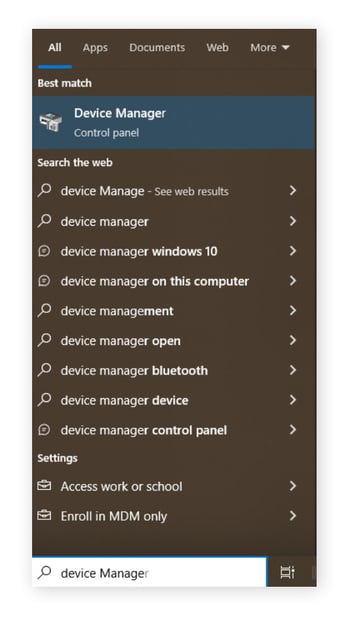
How to clear the print queue on Windows
-
Type device manager in the Windows search bar and open it.
-
Click Print queues.
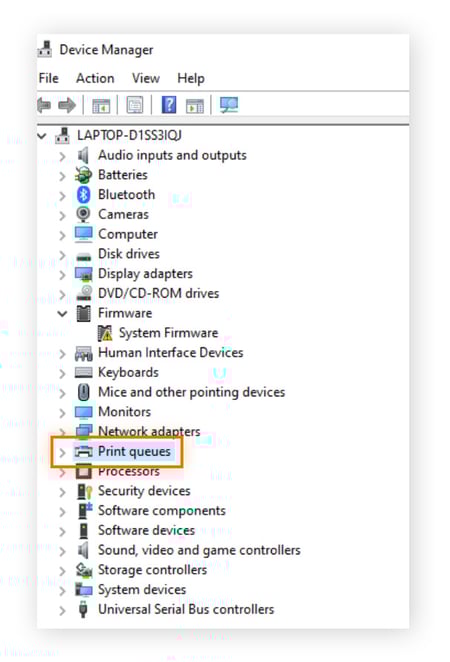
Find your printer in the queue and delete any jobs in its queue.
How to clear the print queue on Mac
-
Open the Apple menu and click System preferences (or System settings in Ventura.

-
Select your printer and click Open Print Queue.
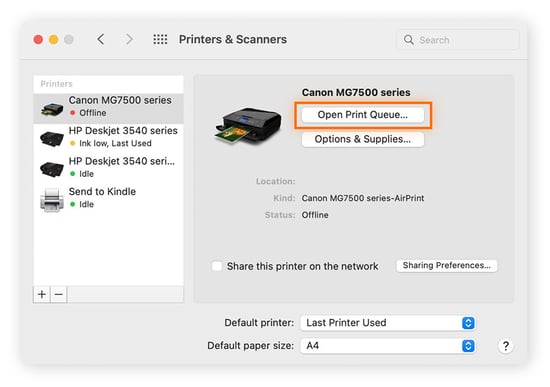
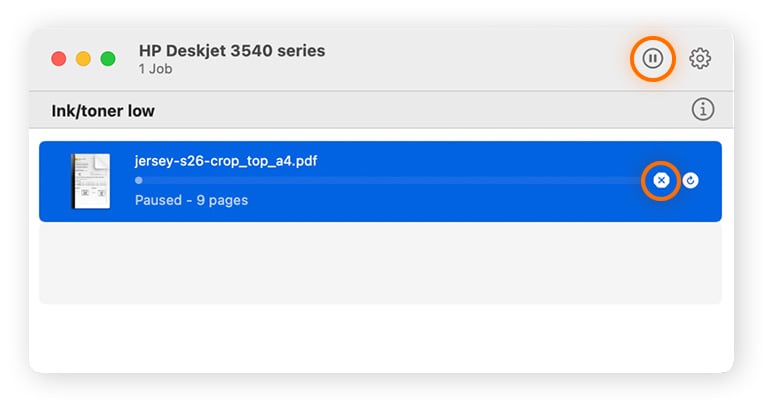
-
Select the name of the job you want to cancel, click the pause icon, then the X button to delete the job.
Reset print spooler
Sometimes, deleting jobs from the print queue isn’t enough. You might have to take your printer offline to fix it completely by resetting the print spooler, which is the software Windows uses to manage print jobs.
-
Type services in the Windows search bar, then open the app.

-
Right-click on Print spooler, then click Stop. Right-click on Print Spooler again, then click Start.
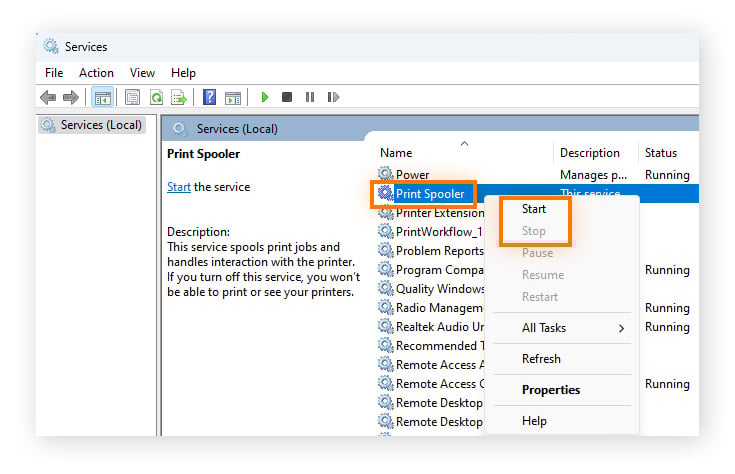
The print spooler should be reset now.
Update drivers
Regularly updating your printer drivers is the best way to keep your printer running smoothly. Drivers are how Windows talks to your devices, and they need to stay updated so they can keep communicating effectively. (Note that updating your drivers will not update your firmware.)
There are three ways to update your Windows drivers: Update Windows to the latest version, download drivers separately from the manufacturer (visit each of their pages for instructions), or use a third-party driver updater to update your drivers automatically.
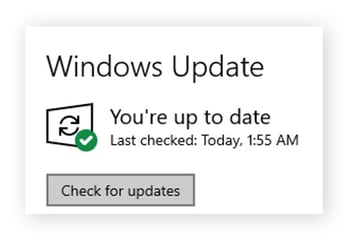
How to update Windows
-
Type Windows update in the Windows search bar. Click Windows Update settings.
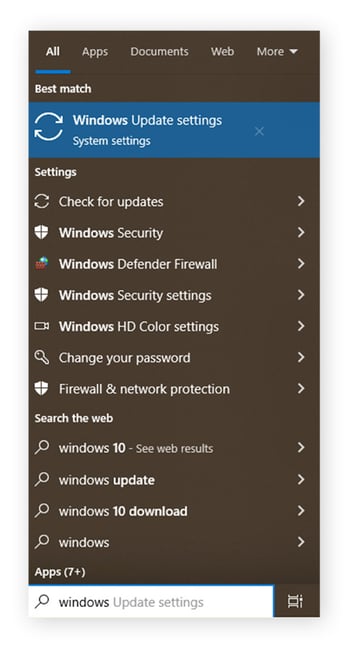
-
Click Check for updates.
Windows tries its best to find all the correct drivers, but with so many models and brands out there, it can miss some. You may have better luck searching for your driver on your manufacturer’s site.
Use a third-party driver updater app
An easy way to make sure all of your drivers are updated is to use an app. It will find and update missing or outdated drivers for everything from your graphics drivers to your printer drivers. Updating drivers increases performance, so you want to pick one of the best driver updaters for PC to do this task, like Avast Driver Updater.
Try the manufacturer's utility software
HP has useful utility software that could help too, and you can find updated drivers on all the brands’ websites:
-
HP: Run the Print and Scan Doctor for Windows or click “Software and Drivers” on the same page to manually update your drivers.
-
Canon: Go to the software and driver download page.
-
Epson: Manually download driver software here.
-
Brother: Manually download driver software here.
Keep your printer running smoothly with Avast Driver Updater
Hunting down drivers manually is a hassle. But with an automated driver updater tool, you can update all your drivers at once, and keep them fully updated without lifting a finger.
Avast Driver Updater automatically scans over 60 million drivers and downloads the ones you need as they’re released to help deliver clearer sound, sharper images, and smoother operation of all your devices — including that pesky printer. Try Avast Driver Updater for free today.
What customers say
More Performance Articles
Facebook Session Expired: Causes, Solutions, and Prevention
How to Get Your Mouse Cursor Back: 11 Tried and Tested Methods
How to Split Screens on Your PC or Laptop (Windows 10 & 11)

Your Phone Is Not Registered On a Network: What It Means and How to Fix It

Why Won't My iPhone Turn On? 6 Easy Fixes to Try

Why Your iPhone Gets So Hot and How to Fix It

Why Is My Ping So High and How to Reduce It

Why Your Keyboard Isn’t Working and How to Fix It in 6 Easy Steps

How to Right-Click on Mac With or Without a Mouse

How to Test for Packet Loss and Check Your Internet Quality

How to Fix Common Printer Problems

Why Does My Phone Keep Restarting and How Can I Fix It?
Performance Tips
Performance
Domenic Molinaro
11-09-2023