- Security
- Privacy
- Performance
VPNs are unbeatable for protecting your privacy, securing your internet traffic, and safeguarding your internet freedom. And if you’ve reached this article, you’re likely about to start using one. Here, you’ll learn all about how to set up a VPN on your device, both manually from within your device settings as well as with a convenient app from your favorite VPN provider.

This Article Contains
This Article Contains
Troubleshoot errors
If you choose a VPN from a reputable provider, you shouldn’t have any issues during the download and installation process. However, shady VPNs will set off a few red flags. Think twice about whether to proceed if a VPN asks you during installation to accept unsigned drivers, or if it triggers your computer’s antivirus software.
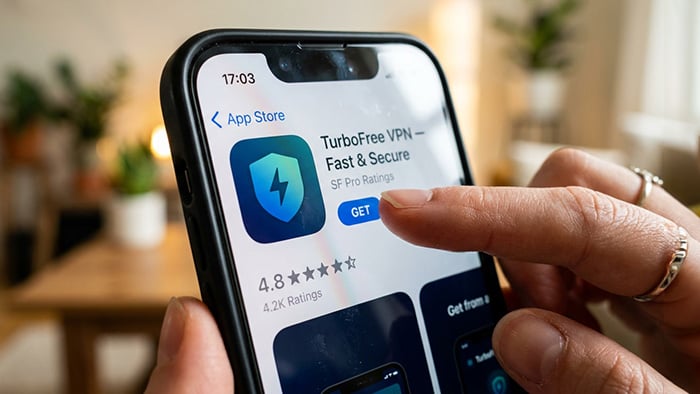
Avast SecureLine VPN has dedicated apps for Windows, Mac, Android, and iOS. If you’re setting up a VPN at home, this is the easiest and quickest way to get started.
Rather than disabling your firewalls or accepting those drivers, consider switching to a VPN from a highly regarded, long-established cybersecurity leader like Avast with Avast SecureLine VPN.
Pick your server
Once you’ve downloaded and installed your VPN app, log in with your username and password. Your next task is to choose the “home” VPN server that you’d like to use. As a general rule, servers located closer to your real-world location will give you faster speeds. But this isn’t always true, especially if those servers are in high demand. Sometimes, you might get better performance going a little farther from home.
If your VPN offers to select a server for you, take its recommendation. It’ll pick a server that’s going to deliver the best speed and service quality at that point in time. If you need an IP address in a specific country in order to unblock websites with your VPN there, feel free to disregard this recommendation. The same goes for streaming, where people often choose VPN locations in the United States, or UK VPN servers — but otherwise, your VPN knows best.
Once you’re connected to your server of choice, there’s nothing left to do but turn on your VPN and enjoy your upgraded online privacy and security.
Configure your settings
If your VPN is working great, you can feel free to ignore this step. Most top-level commercial VPNs are already preconfigured by the provider to perform optimally. Consult your VPN provider’s recommendations and guidance before making any changes to your settings.
VPN apps also offer crucial advantages that you’ll miss out on if you set up your own VPN.
One thing you may be able to adjust is your VPN protocol. The protocol determines how your VPN creates the encrypted connection between your device and the VPN server. The popular and secure OpenVPN protocol is an open-source option, which means that security experts and programmers can easily inspect it for any vulnerabilities. Other protocols may not be as secure.
Some VPNs come with a “kill switch,” which cuts your internet access should your VPN go down. It’s a security feature designed to prevent your data from being intercepted while you’re not connected to your VPN. But if you wind up misconfiguring your kill switch settings, you could lose your own internet connection by accident. Proceed with caution.
Manually setting up a VPN
If you’ve either purchased or otherwise acquired the ability to connect to a VPN server, you can manually configure your device to use it without downloading a commercial VPN app. For example, you may need to learn how to set up your own VPN to connect to your work’s network while at home or when traveling.
In order to create a VPN on your device, you’ll need to know a few details about your VPN server to get started:
-
The VPN address: For a work VPN, it may be something like “vpn.yourcompany.com”
-
Your login credentials: A username and password
With this information, you can begin setting up your own VPN — but it’s not as easy as flipping a switch. Commercial VPN apps from reputable providers are designed to keep your data secure at all times. When you choose to DIY instead, you may leave yourself exposed should you make even one mistake.
VPN apps also offer crucial advantages that you’ll miss out on if you set up your own VPN.
-
Multiple servers around the world: Top-level VPN providers maintain servers all across the world, offering faster speeds and a wide variety of IP addresses. Switching from one server to another rarely takes more than a click or two within the app’s interface. With your homemade VPN, you’re limited to just one server. And if you want to switch to another, you’ll have to manually configure that change within your VPN settings. Forget about switching on the fly.
-
IP sharing: Many VPN providers allow multiple users to share the same IP address, which masks all their actions under a single banner. That means that an outside observer or hacker would have a much harder time identifying the actions of a single user and matching them with that user’s actual IP address or real identity.
-
Customer support: If something goes wrong with your VPN app, you’ll appreciate a dedicated support team. With a homemade VPN, you’re on your own.
-
Innovation: VPN technology is a rapidly evolving field, with exciting new protocols being developed all the time. Because the consumer VPN market is highly competitive, providers are incentivized to continually add cutting-edge technology and security measures to their products.
-
OpenVPN support: Windows, macOS, Android, and iOS all require additional software to support OpenVPN. To use this fast and secure protocol when setting up your own VPN, you’ll need to download the OpenVPN client and install it on your device (or use your provider’s app). You’ll also have to download the configuration files separately from your VPN provider.
-
Convenience and peace of mind: Configuring your own VPN is a convoluted process at best, with lots of room for mistakes. Downloading and installing a security certificate, for example, can require over 15 steps in Windows 10. And that’s before you even begin to set up your actual VPN.
But if you’re unfazed by the lack of commercial VPN features and the rather involved setup process, it’s time to find out how to make a VPN on Windows 10, older versions of Windows, Mac, Android, and iOS. Remember, you’ll need to already have access to a VPN server in order to set up the VPN yourself.
Set up a VPN on Windows 10
To set up your own VPN on Windows 10, follow this procedure:
-
Type “VPN” into the search box in your taskbar, then open your VPN Settings.

-
Click Add a VPN connection.

-
Here, you’ll enter all the information about your VPN.
-
Under VPN Type, choose your connection protocol. If you plan to connect with the IKEv2/IPSec protocol, you may need to download and install a special security certificate from your VPN provider.
-
Choose your authentication method under Type of sign-in info and provide those details.
-
When you’re finished, click Save.

-
-
In your taskbar, click the icon that corresponds to your internet connection: either Wi-Fi or wired network. Then, connect to your new Windows 10 VPN.

You’ll get IP privacy, data encryption, and a whole lot more when you protect yourself with a VPN. But, as mentioned above, you need to already have access to a VPN server, and manually setting up a VPN can be tricky. If you’re looking for an easier, more seamless way to set up a VPN, then give Avast SecureLine VPN for PC a spin today with our seven-day free trial.
Set up a VPN on Windows 7 and Windows 8
Setting up a VPN in Windows 7 is largely the same as doing so in Windows 8. We’ll show you how to set up a Windows VPN using Windows 7 as an example. If you’re using Windows 8, you can follow along here as well.
-
Open the Start menu and type “VPN” into the search box, then select Set up a virtual private network (VPN) connection.

-
Input the address of your VPN server and give it a name. Then, click Next.

-
Enter the login credentials for your VPN. When you’re done, click Connect, and you’ll activate your new Windows VPN.

Set up a VPN on a Mac
We don’t leave Apple fans out in the cold — here’s how to set up a VPN on your Mac.
-
Open your System Preferences from the Apple menu.

-
Select Network.

-
Click the + icon and select VPN from the drop-down menu.

-
You’ll need to choose a different VPN protocol from the drop-down menu, because macOS doesn’t offer native support for OpenVPN. Give your VPN a name if you like, and click Create.

-
In the next screen, enter your VPN server address and remoteID if required. If you don’t have this information, request it from your VPN provider. Then click Authentication Settings….

-
Choose your authentication method from the drop-down menu, then enter the corresponding information. In the example below, we’ll authenticate with our username and password. When you’re done, click OK.

-
Click Apply to lock in your changes, then click Connect to test and use your new VPN. You’ll know that it’s working properly when the status indicator next to your VPN turns green.

Now that your VPN is all set up, you’ll enjoy IP privacy, data encryption, and a whole lot more. But if it wasn’t already obvious from the steps laid out above, manually setting up a VPN on Mac isn’t as easy as a single click — and it’s not even possible unless you have access to a VPN server to link your VPN to. For a simpler way to use and set up a VPN, download Avast SecureLine VPN for Mac today and give it a spin with our free seven-day trial.
Set up a VPN on Android
The process for getting a VPN on your Android phone may vary slightly from one manufacturer to the next. Your Android version may also affect this process — though we recommend that you always use the latest version of any software on your devices.
Depending on your phone, you may have a choice of VPN protocols, which can include PPTP, L2TP/IPSec, and others. Here’s how to set up a VPN on Android with a Pixel 2 running Android 10.
-
Open your Settings and tap Network & internet.

-
Tap Advanced.

-
Tap VPN.

-
Tap the + icon to add a new VPN.

-
Tap Type to choose your desired VPN protocol from the drop-down menu.

-
Enter your VPN details, including the server name, your user credentials, and provide any other requested information.

-
When you’re done, tap Save. You’ll need to configure a new VPN for every server you want to use.
If you’re having trouble manually setting up a VPN on Android — or don’t have access to a VPN server you can use — you’re not alone. For a faster, much more straightforward VPN setup, download and install Avast SecureLine VPN for Android today and give it a whirl with our free seven-day trial.
Set up a VPN on your iPhone or iPad
Like its big sibling macOS, iOS doesn’t offer native support for OpenVPN. If you want OpenVPN protection on your iPhone or iPad, but don’t want to use a commercial provider’s app, you’ll have to install the OpenVPN Connect iOS app instead.
If you’d prefer not to install anything, you’re limited to L2TP, IPSec, and IKEv2. Here’s how to access your iOS VPN settings and get a VPN on your iPhone.
-
Open your Settings, then scroll down and tap General.

-
Scroll down and tap VPN.

-
Tap Add VPN Configuration….

-
Tap Type to select your desired protocol. Note that L2TP includes IPSec encryption, even though it doesn’t mention it. Then, tap Back.


-
Fill out all the info that you have for your VPN. The requested information will change depending on your chosen protocol.

-
When you’re finished, tap Done. You’ll need to add a new VPN configuration each time you want to connect to a new server.
If you don’t have access to a VPN server, or if you’d rather just skip all the steps and screenshots above, don’t worry. There’s a much easier way to encrypt your internet connection: simply download Avast SecureLine VPN for iOS and let our app handle everything for you. Enjoy a faster, more seamless setup and one-click ease, and keep all your internet activity private.
Download and install Avast SecureLine VPN today, and test it out with our free seven-day trial.
Do I really need a VPN?
VPNs offer a combination of privacy and security benefits that’s hard to replicate with other solutions. For example, VPNs, proxies, and Tor are all popular privacy tools, but only VPNs encrypt all the traffic coming to and from your device. Wondering what else a VPN can do for you?
-
Conceal your IP address: When you connect to a VPN, it replaces your personal IP address with one of its own. The sites and services you use while connected will see only the VPN’s IP address, while yours remains hidden. If your VPN allows IP sharing, it’s even more difficult for someone else to identify you online.
-
Protect your data with encryption: The connection between your device and the VPN server is encrypted — a process known as data in transit encryption. Anyone on the outside looking in will see only a scrambled mess, with your data remaining safe and secure. Even your own internet service provider (ISP) won’t be able to peek inside. That level of data encryption is essential to stay protected when you’re on unsecured public Wi-Fi, otherwise other users on the same network could easily see your traffic.
-
Hide your internet activity: Data encryption also prevents anyone else from seeing what you’re doing while connected to your VPN (though the type, timing, and amount of traffic can be determined). That means that your ISP, your company, or even your government won’t know the specifics of how you spend your time online.
-
Fast security: If you choose a VPN that has servers all over the world, the provider can spread its users across a wide range of connections. That means there’s more bandwidth per user on each server, which translates to faster speeds for you.
-
Travel the world: If your VPN allows you to choose your server location, you can use it to digitally place yourself in any country you want. Watch your favorite TV shows online with a VPN for a taste of home when you’re traveling abroad.
With an easy-to-use VPN app (with a simple setup process) you’ll start enjoying these benefits right away.
Set up a VPN the easy way
VPN setup is a snap with Avast SecureLine VPN. Bank-grade encryption secures your traffic as it travels to and from our lightning-fast servers located all around the world. Stay private online, secure your data, and access the content you want — at speeds that can deliver it. With our quick, easy, and no-hassle app, true digital privacy is just a single click or tap away. Try it out today with our free seven-day trial.
What customers say
More Privacy Articles
Are free VPNs safe?

Can You Be Tracked While Using a VPN?

What Is VPN Split Tunneling?

VPN Kill Switch: What It Is and Why It Matters

What Is a Replay Attack and How Does It Work?

How to Fix The “Connected Without Internet” Wi-Fi Issue

Understanding AES Encryption: What Is the Advanced Encryption Standard?

Is Telegram Safe? A Guide to the Secure Messaging App
How to Encrypt Email on Gmail, Outlook, iOS, Android, and Other Platforms

VPN Protocols Explained and Compared

How to Stream Your Favorite TV Shows With a VPN

The Most Secure Messaging Apps in 2026
VPN
Privacy
Ivan Belcic
29-07-2020