- Security
- Privacy
- Performance
Macs are known for their longevity, but they still need regular maintenance. Without it, the “startup disk full” error message may appear, along with performance issues. Learn how to fix this problem and avoid it in the future by using Avast Cleanup to make your Mac work better than ever.

This Article Contains
This Article Contains
What is a startup disk?
The startup disk is the drive that contains a computer’s operating system. Drives store computer data and contain a limited amount of memory. If your startup disk is almost full, memory and performance problems can arise.
What does “Your startup disk is almost full” mean?
When you get the message, “Your startup disk is almost full,” it means your Mac is running low on storage space. As a result, your Mac will experience slower performance and have issues saving files, updating apps, and browsing the internet. Keep in mind that Macs require at least 10% of free space available on the startup disk to work properly.
How to check disk space on a Mac
You can check the disk space on your Mac pretty easily — the process is similar to checking storage on your Mac. Here’s how to check disk space on a Mac:
-
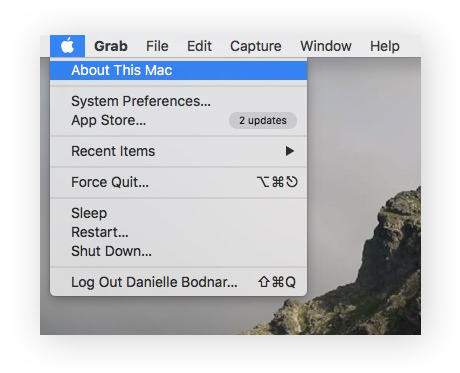
Click the Apple menu icon on the top left corner of your screen, then click About this Mac in the drop-down menu. On macOS Ventura, click the Apple menu, then System Settings, then General.
-
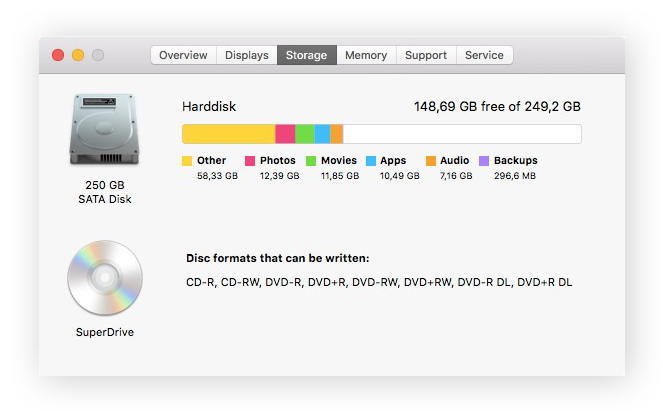
Select Storage. Here, you should be able to see how full your Mac storage is. The color-coded chart shows how much space your files and apps are taking up, with categories such as Photos, Apps, Backups, and Other storage on your Mac. Ideally, you want to keep at least 20GB of free space.
Read on to see how to clean up your Mac manually. Or, skip the hassle and do it automatically by installing Avast Cleanup. Avast Cleanup for Mac finds unused apps, duplicate files, and junk data that are taking up space on your Mac, and it easily lets you delete them with a single click. Try it for free today.
How to clear the startup disk on a Mac
There are a few different ways to clear the startup disk on your Mac, depending on how the Mac is used and what is taking up the most storage space.
You can go through each of the methods below to see what most effectively clears your startup disk. Cleaning out each of these regularly will help free up disk space and keep your Mac’s startup disk running smoothly.
The screenshots below are from a MacBook Pro, but the same steps apply to a MacBook Air, iMac, or a Mac mini.
Here are six common ways to free up space on your Mac startup disk:
Delete browser cache
The browser cache contains data used on websites you frequently visit. In general, a cache is a segment of storage space reserved for particular purposes (such as storing browsing and app data, as explained below). While this helps web pages load faster, over time, too much data in your browser cache will slow things down.
Here’s how to clear your browser cache on Mac’s default browser, Safari:
-
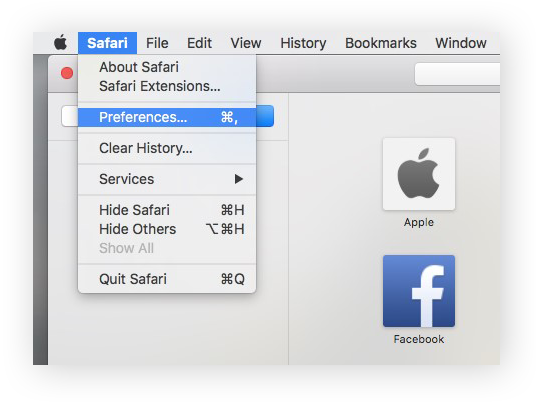
Open Safari. Select Preferences in the main menu (select Settings if you’re on macOS Ventura).
-
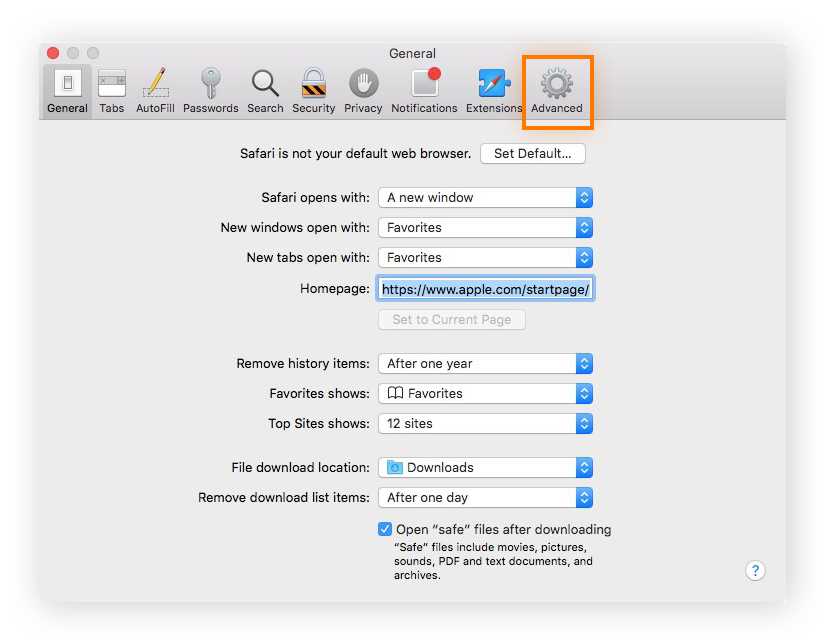
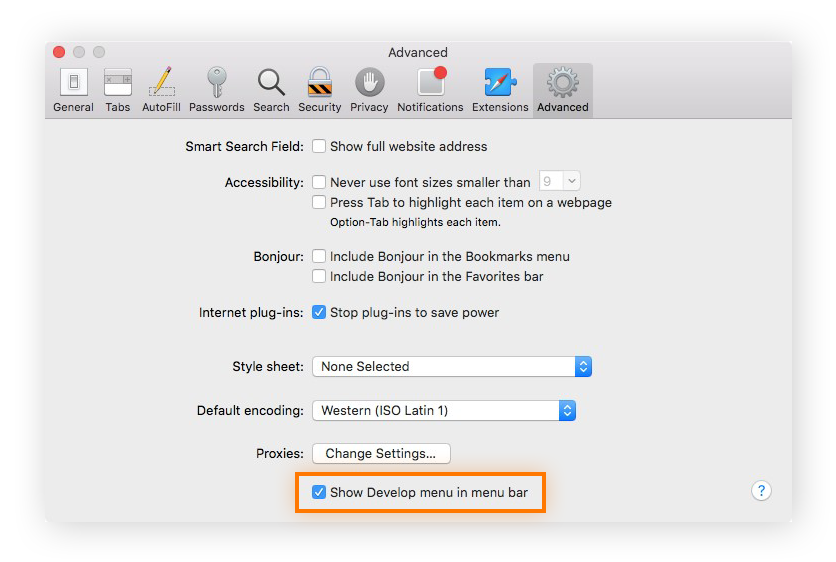
Click Advanced.
-
Tick the Show Develop menu box. The Develop menu should now appear in the Safari menu bar at the top of your screen.
-
Open the Develop menu and click Empty Caches. The browser cache should empty in seconds.

For more information on browser cache, and how to clear it on other browsers, check out our article on how to clear your cache on a Mac. While the process is slightly different depending on which browser you use, the result is the same: an empty cache free of clutter. You can also use a browser cleaner tool to keep your cache clean automatically.
Delete app cache
App cache files are located in your macOS library, and they save certain app data (such as the songs you listen to on Spotify) to save time and processing power from having to download this data over and over again. Like all caches, however, they can quickly accumulate and slow down your Mac.
Here’s how to delete your app cache on a Mac:
-
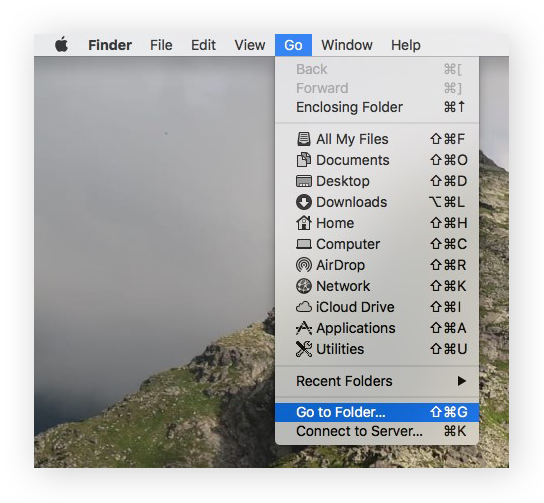
Go to Finder and in the Go menu and select Go to Folder. (Or use the keyboard shortcut Shift + Cmd + G.)
-
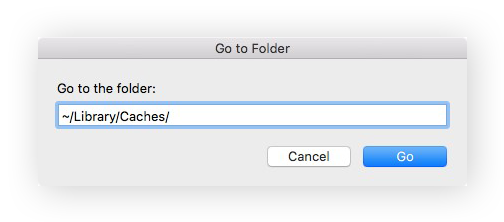
Type ~/Library/Caches/ in the search box and select Go.
-
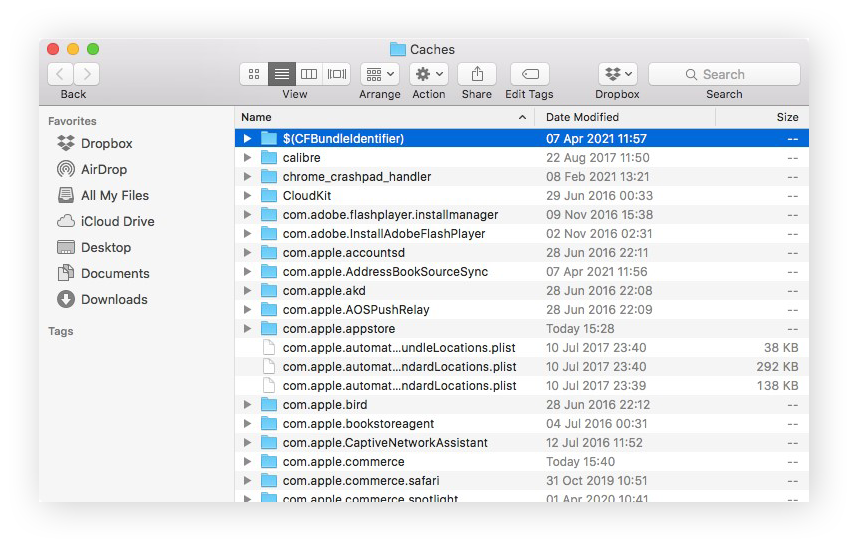
Click and drag folders containing unnecessary files to the Trash. Examine each folder carefully to ensure that you don’t accidentally delete important files. Google the name of the folder or files to check, but if in doubt, it’s safest to leave the file.
Empty trash/downloads
Even if you’re diligently deleting unnecessary files, the Trash folder doesn’t empty itself. Thankfully, emptying the Trash is quick and easy. Simply open the Trash application and select Empty, then Empty trash. And voila — unnecessary files are gone.
Some individual apps may also have their own trash folders, so be sure to clear those out from time to time as well. All Trash options across all apps and macOS versions allow for easy emptying, with one or two clicks.
Clearing out downloads is a similar process. Some downloads may be precious, but some, such as installation files for apps downloaded from the internet, become useless once you’ve installed the application. Here’s how to delete downloads from your Mac:
-
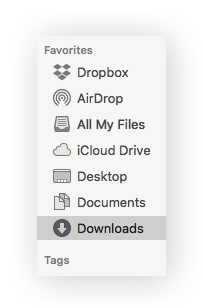
Open Finder and click Downloads.
-
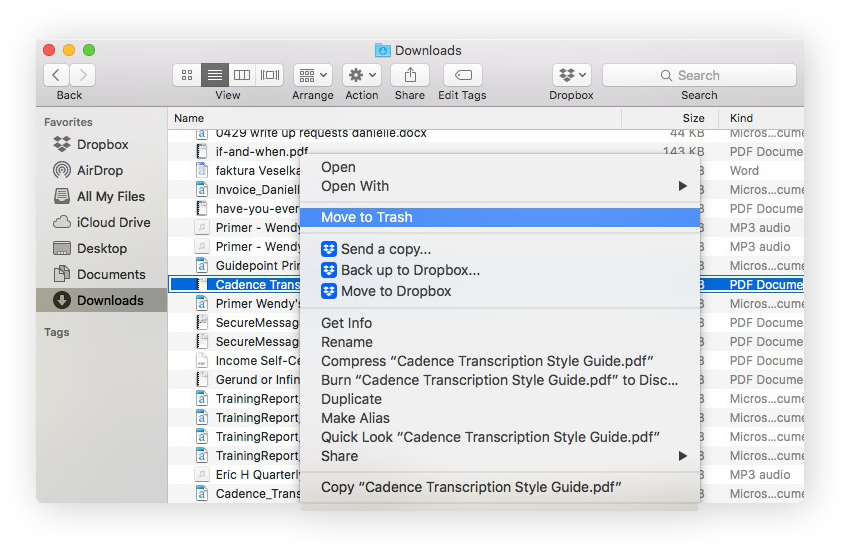
Select the files you want to delete, or if you want to delete them all, use Cmd + A to select all. Right-click the files and select Move to Trash.
-
Now open the Trash app and select Empty, then Empty trash.

Uninstall unused applications
You probably have apps on your Mac that you no longer use, but haven’t deleted. These apps take up precious hard drive space and use RAM at startup.You can find and uninstall unused apps in a few different ways — one of the easiest is through Finder.
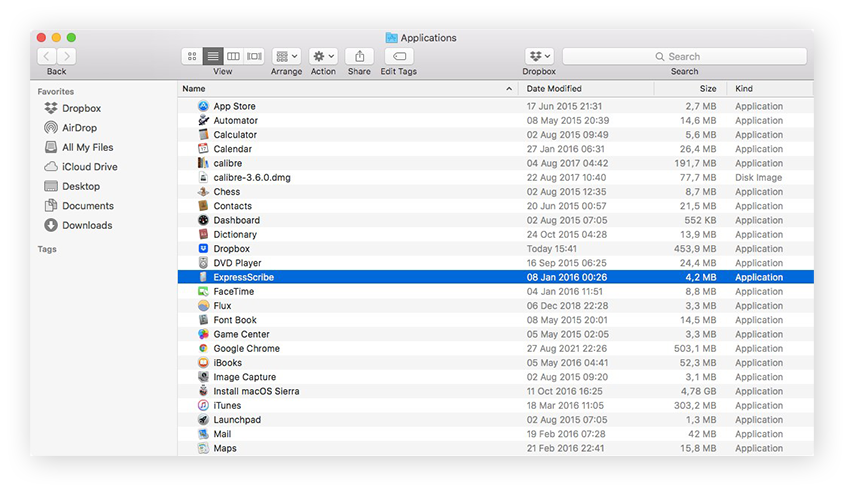
To view the apps installed on your device, open Finder and go to Applications. There, you should see all the apps installed on your Mac. You should be able to recognize the apps you don’t use or haven’t used in a long time.
Here’s how to uninstall apps on your Mac via Finder:
-
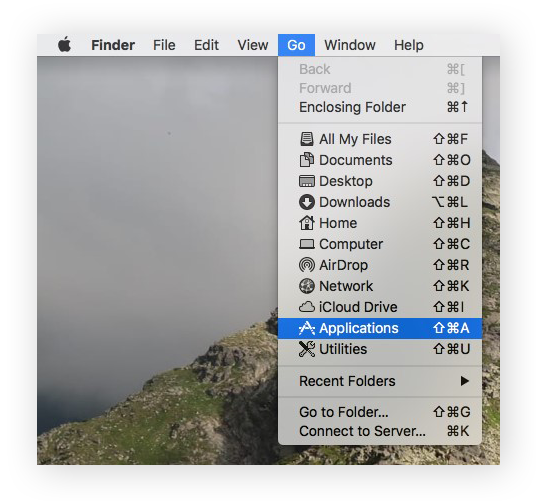
Open Finder and go to Applications.
-
Select the app you want to delete.
-
Press Cmd + Delete or click and drag the file to the trash. Repeat the same steps with any other apps you want to delete.
-
Empty the Trash to complete the process.
For more ways to uninstall apps from a Mac, check out our article on uninstalling Mac apps. Note that even after uninstalling these apps, some cache files may still be left behind. In that case, review and delete app cache files to make sure that the files are totally cleared.
Manage the Photos Library
Photos can also take up a lot of space. You should delete any duplicates or photos you don’t want to keep. Use Avast Cleanup for Mac to help speed up the process. It will scan your photos and identify similar or poor-quality images, and you can decide which to delete.
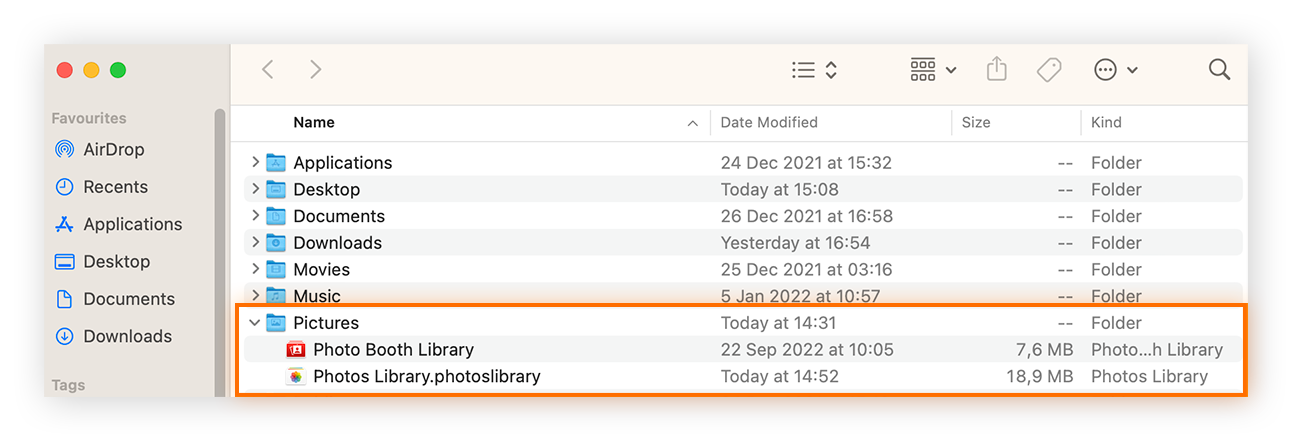
Occasionally, users end up with a duplicate Photos Library from updates. By default, your Mac’s Photos Library will be in the Pictures folder. To view your Photos Library, follow these steps:
-
Open the Finder menu, select Go, then select Home.

-
Expand the Pictures folder and look for your Photos Library.
-
If you have two that look the same, check the contents carefully. Then, make a backup on an external storage device before moving the duplicate to the Trash.
You can also review the Photo cache in the cache library — but tread carefully here, as you don’t want to accidentally delete any important photo files.
Remove old iOS backups
If you have an iPhone or iPad and regularly back them up on your Mac device, you may have old backups taking up space. It’s important to keep at least the two latest backups in case you need to roll back. You should remove older versions though, as they take up a lot of space.
You can start by checking if you have any old backups saved on your Mac, then proceed with deleting them.
Here’s how to find and delete any backups stored on your Mac:
-
Open a new Finder window.
-
Click your device.
-
In the General tab, click Manage Backups.
-
Right-click the backup you want to delete, then click Show in the menu bar.
-
View the details of the backup before clicking Delete.
Your Mac may also contain junkware and other useless files and software. Whenever and however you decide to clean up your Mac, be sure to do a thorough job so you get the most space and best performance with minimal clutter.
How to expand your free space
While the above methods can help free up space on your startup disk in the short term,you’ll probably need to expand the storage space on your Mac to get more storage in the long term. Otherwise, your Mac’s startup disk might quickly fill up again.
Here are the best ways to add free storage space to your Mac:
Cloud storage
Cloud storage, in which files are stored on an online server, is an increasingly popular method for storing files. Since most people can connect to the internet with their devices instantly, using cloud storage is virtually indistinguishable from hard drive storage. Cloud storage also enables you to access files across multiple devices, making it extra convenient.
However, while cloud storage won’t affect your Mac’s performance, you have a limited amount of allocated cloud storage, and you can quickly use it up. Cloud storage services like Dropbox usually have capacity limits according to account type, so be sure to regularly delete files from iCloud or any other cloud storage to avoid going over your limit.
If you need to extend your limit, you can usually upgrade your plan or buy more space. With Apple’s iCloud storage, you get 5GB free when you sign up. If you need more space or want to take advantage of iCloud+, Apple’s premium cloud subscription, there are different plans ranging from $0.99 to $9.99 a month.
External storage
Using an external storage device (like a portable drive or USB stick) can also help expand your storage capacity. External drives can be HDDs or SSDs that connect to your device via USB. You can move files to these external drives, and then reconnect the drive to your Mac whenever you need to access the files.
HDDs (hard-disk drives) are classic hard drives that are cheaper than SSDs, but they tend to be slower and are more prone to damage. SSDs (solid-state drives) are faster and more durable, but they don’t have the same storage capacity as HDDs.
External drives are also limited in their capacity, though some can have very generous storage space for ordinary users — the largest HDDs can hold more than 20TB of data. However, if you’re an intensive user (and work with large video files), you’ll still need to review and clear out files regularly.
Other methods to improve the capacity and performance of your Mac are out there. You can defrag your Mac or manage startup processes and files to speed up your Mac and free up memory. You can also try dedicated cleanup software — just make sure it’s legit first. Luckily, you don’t need to look far to find good cleaning software for Macs.
Keep your Mac running smoothly with Avast Cleanup
No matter how you store your files, regular cleaning is inevitable. Avast Cleanup makes the chore as painless as possible. Its App Uninstaller quickly identifies unnecessary apps you haven’t used in ages, and lets you easily decide if you want to delete them.
Macs also collect tons of junk files over time. Avast Cleanup deep-scans your Mac for these hidden junk files and caches that you don’t need, and it lets you delete them in a single click. Try Avast Cleanup for free today and get a cleaner, faster Mac.
What customers say
More Performance Articles
How to Clear the Instagram Cache on Your Device

The Applications Folder on Mac: How to Find and Access Your Apps
How to Clear System Data or “Other” Storage from Your iPhone

How to Fix Corrupted Files on Windows Using SFC And DISM

How to Lower CPU Usage on Windows

How to Fix the Blue Screen of Death (BSOD) on Windows 10 and 11

How to Clean Your Computer Screen Without Damaging It
How to Clear Cache in Chrome and Other Browsers

How to Screen Record on Your Mac or Macbook (With or Without Audio)

How to Delete Cache and Cookies on Your iPhone
How to Clear the Cache on Your Mac

Android Safe Mode: How to Turn On & Disable Safe Mode on Your Phone
Cleaning
Performance
Danielle Bodnar
13-01-2023