- Security
- Privacy
- Performance
Want to change your IP address? You’ve got options — tweak your settings, restart your router, or use a proxy. Want to go one better? Use a VPN to automatically and securely customize your IP location at the touch of a button. Keep reading to learn how to change your IP address on Windows, Mac, Android, and iOS devices, or let our VPN handle it for you automatically.

This Article Contains
This Article Contains
What is an IP address?
An IP address is a string of numbers that identifies any device on a network, allowing computers, phones, and smart gadgets to communicate with each other over the internet and within local networks. These addresses include location information, which helps devices, routers, and websites identify themselves and send or receive data efficiently.
But IP addresses can also be used to track your online activity, restrict access to content, or charge you higher prices based on your location. That’s why changing or hiding your IP address can offer several privacy and accessibility benefits, as well as help troubleshoot connectivity issues.
Different ways to change IP address
There are four main ways to change your IP address:
The right option depends on why you want to alter your IP address: manual changes can help you configure your local network setup, but if you’re looking to boost your privacy or change your virtual location, it’s a VPN you’re after. Likewise, while proxies help mask your IP for browsing or content access, router resets can only refresh your dynamic public IP.
1. Change your IP address manually
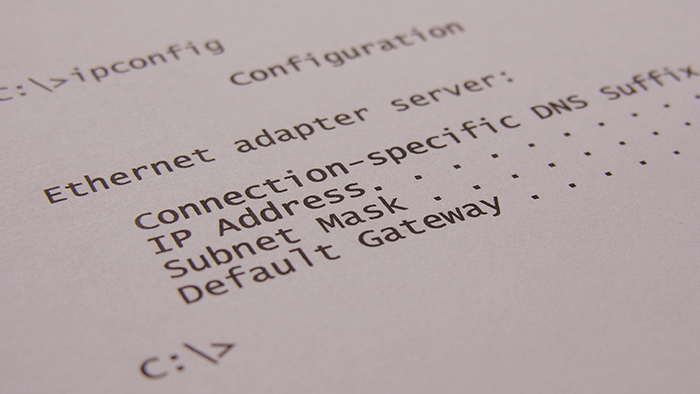
Manually changing your IP address means entering a specific private IP for your device instead of letting your router assign one automatically. This switches you from a dynamic IP to a static IP, which means you’ll need to choose an address that’s within your network’s allowed address range and not already used by another device. Type “ipconfig” into Command Prompt and use the network IP and subnet mask data to calculate your network range.
Keep in mind, this only affects your private IP rather than the public IP assigned by your ISP that websites and services see. So, unlike other methods to change your IP address, it won’t alter the location that websites and advertisers see you browsing from, or boost your privacy. Unless you have a specific reason like network troubleshooting or setting up port forwarding, it’s best not to manually set up static IPs, as they can cause network conflicts or connectivity issues.
Unless you have a specific reason, like setting up port forwarding or configuring a printer, NAS, server, Smart TV, or other device that benefits from a fixed IP, it’s generally best not to manually assign static IPs, as this can sometimes lead to network conflicts or connectivity issues.
How to change your IP address on Windows 11
-
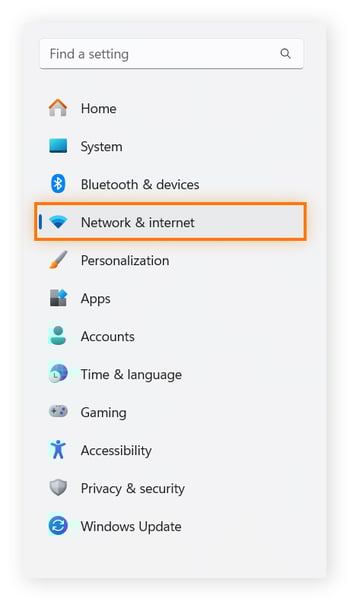
Click Start > Settings > Network & Internet.
-
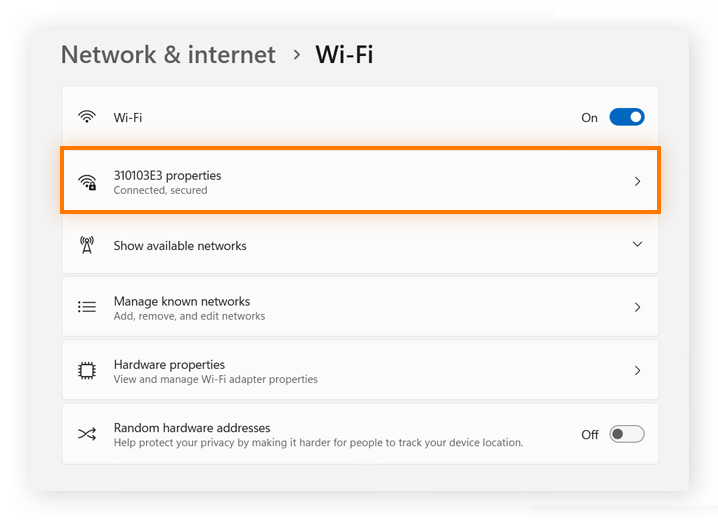
Click Ethernet or Wi-Fi and select the network you’re currently connected to.
-
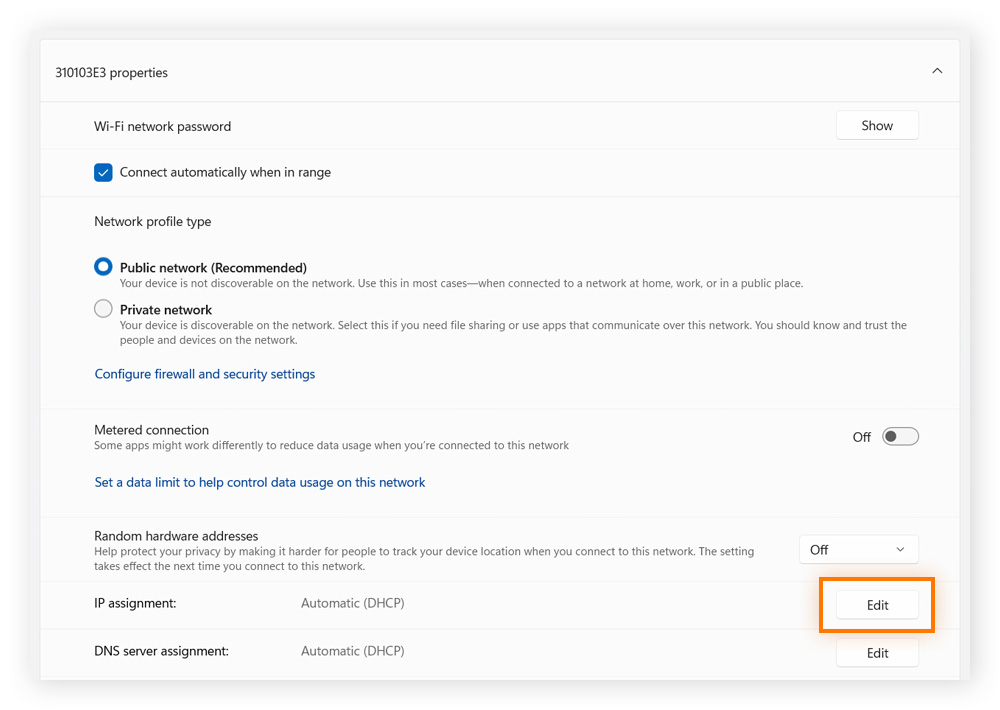
Click the Edit button next to IP assignment.
-
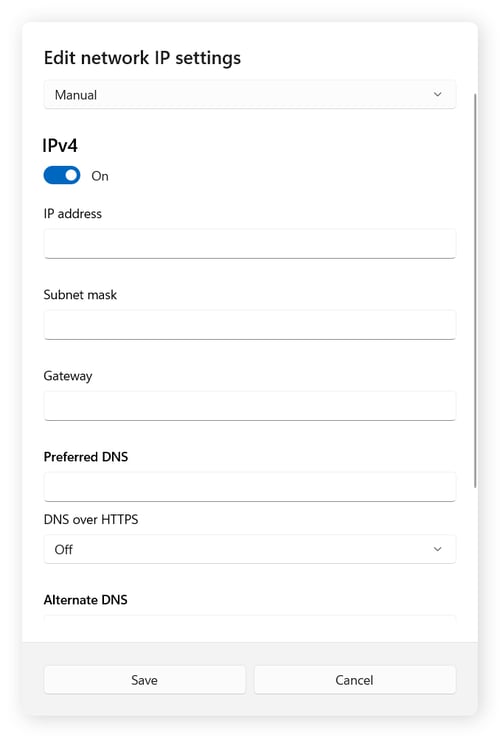
Set the network IP settings to Manual, ensure IPv4 is enabled, and then enter the IP address configuration in the IP address, Subnet mask, and Gateway boxes.
-
Click Save to activate your new settings.
How to change your IP address on Windows 10
-
Click Start > Settings > Network & Internet.
-
Under your local area connection, click Properties.
-
Under IP assignment, click Edit.
-
Choose Manual, toggle on IPv4, and enter the IP address. Then click Save.
How to change your IP address on Mac
-
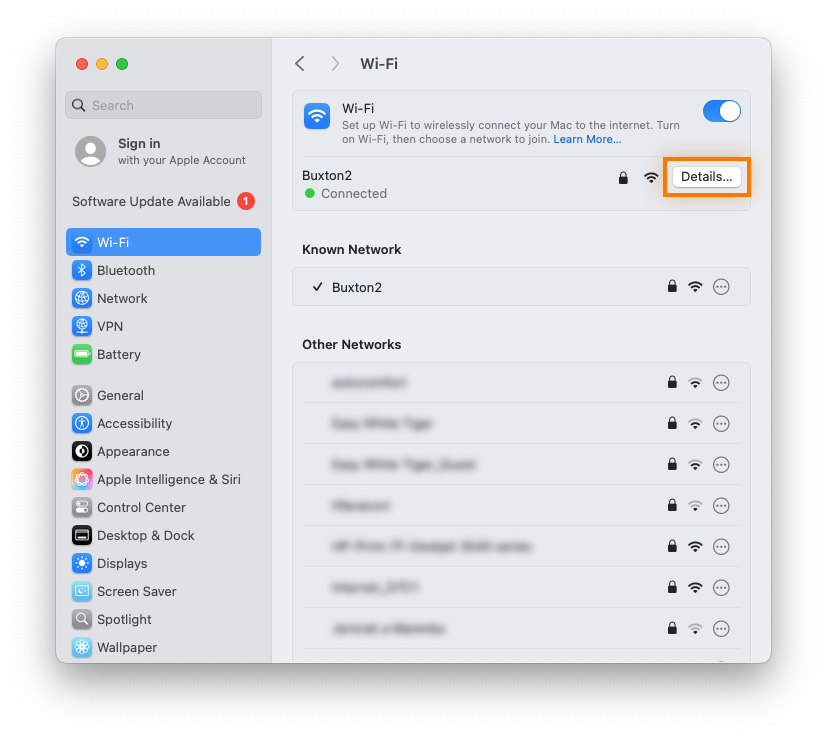
Open System Preferences, select Wi-Fi from the left-hand menu, and click the Details button for your current network connection.
-
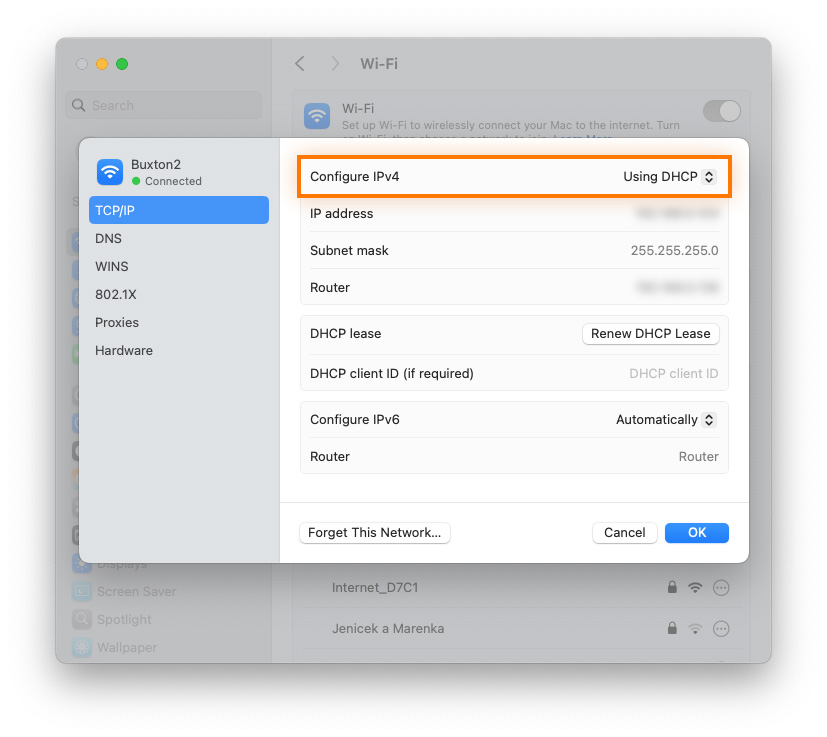
Click the TCP/ IP tab and select Manually under Configure IPv4.
-
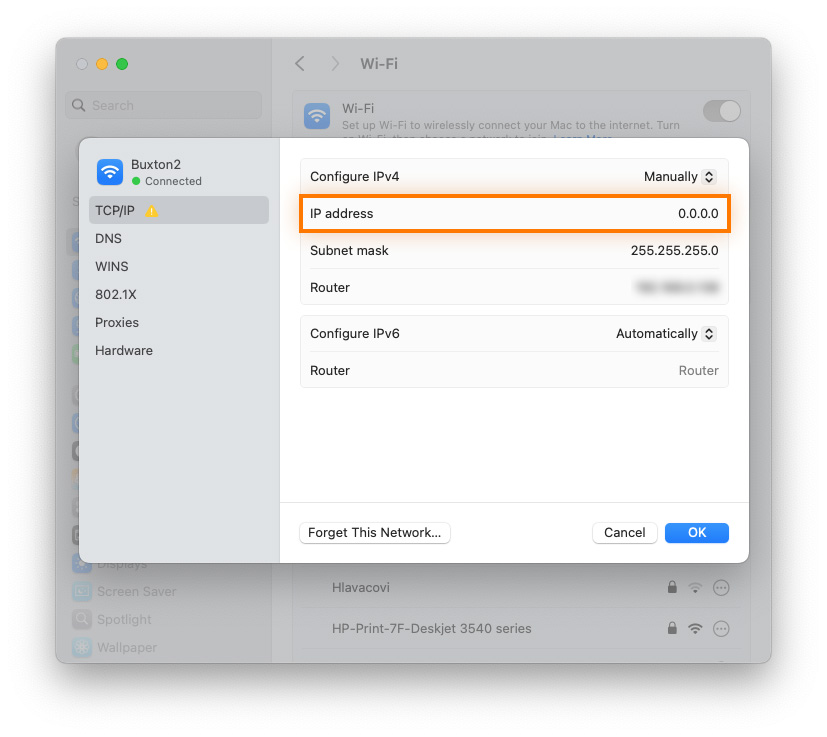
Enter your new IP address and click OK.
How to change your IP address on Android
-
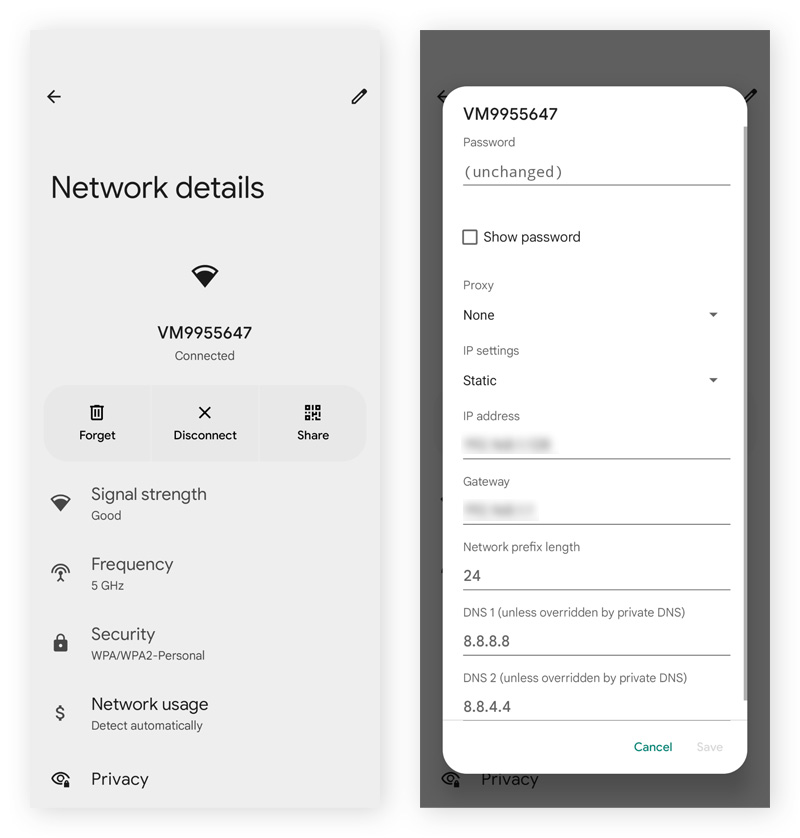
In Android Settings, tap Network and Internet, then Internet.
-
Tap the gear icon next to your current network, tap the pencil icon, open Advanced options, and use the drop-down menu underneath IP settings to select Static. Then add your new IP address and tap Save.
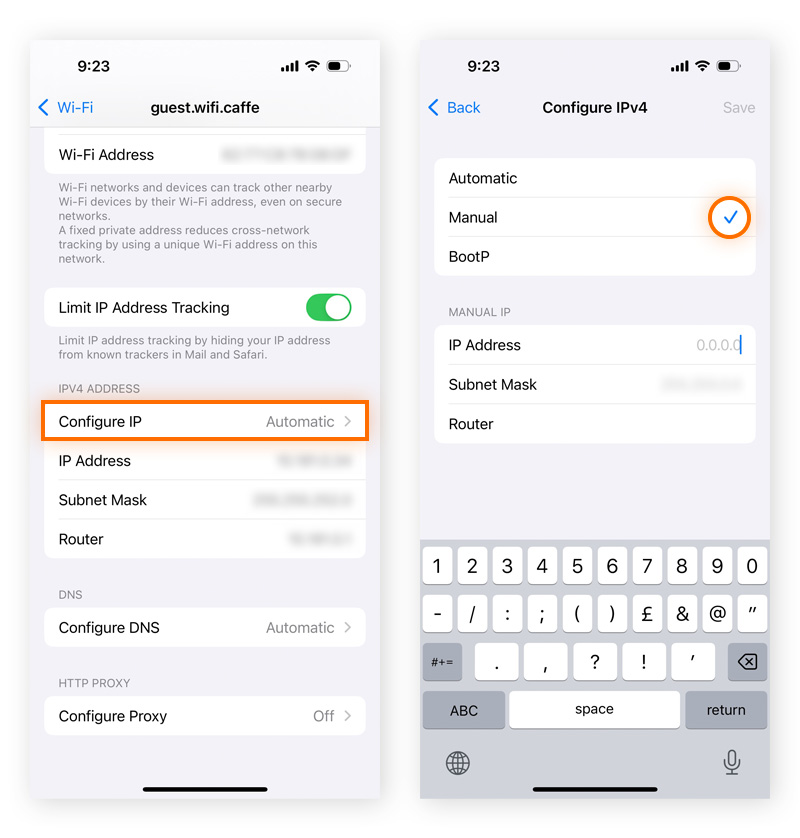
How to change your IP address on iOS
-
In the Settings of your iPhone or iPad, tap Wi-Fi, and tap your current Wi-Fi connection.
-
In the IPv4 section, tap Configure IP, choose Manual, and enter your new IP address.
Manually change IP address on Linux
To manually change your IP address on Linux, run the following command:
sudo ifconfig <interface_name> <new_address> netmask <network_mask>
“Interface_name” refers to names like eth0 or wlan0, and it describes what kind of connection you’re using. “New_address” and “network_mask” refer to the new IP address and network mask you’ve chosen. Setting your IP address in Linux is as easy as inputting one command!
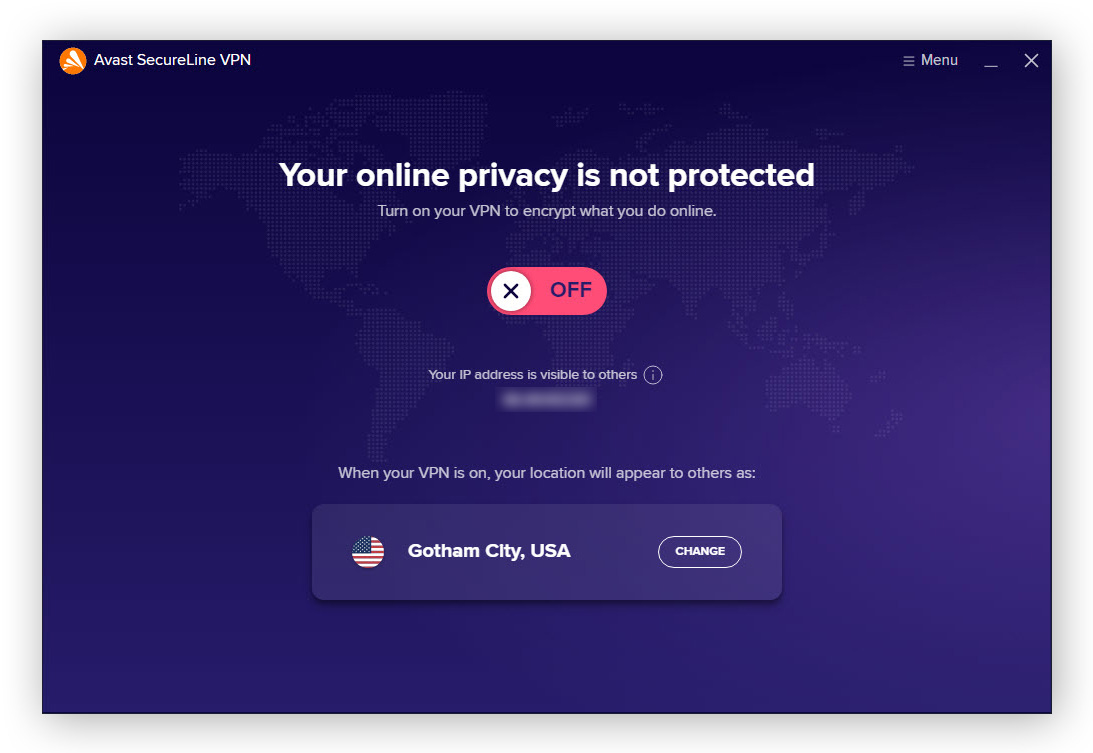
2. Change your IP address automatically with a VPN
The best way to quickly and easily change your public IP address is with a VPN. By encrypting your connection and routing your internet data through a secure server, VPNs mask your activity by providing you with a new public IP address that alters your virtual location, strengthening your privacy, and helping you access your favorite content.
Here’s how to change your IP address with a VPN:
-
Download and install a trusted VPN like Avast SecureLine VPN.
-
Open the application.
-
Toggle the switch to ON to connect to the best remote server location in seconds. Alternatively, click CHANGE to select a specific US VPN server or other location.
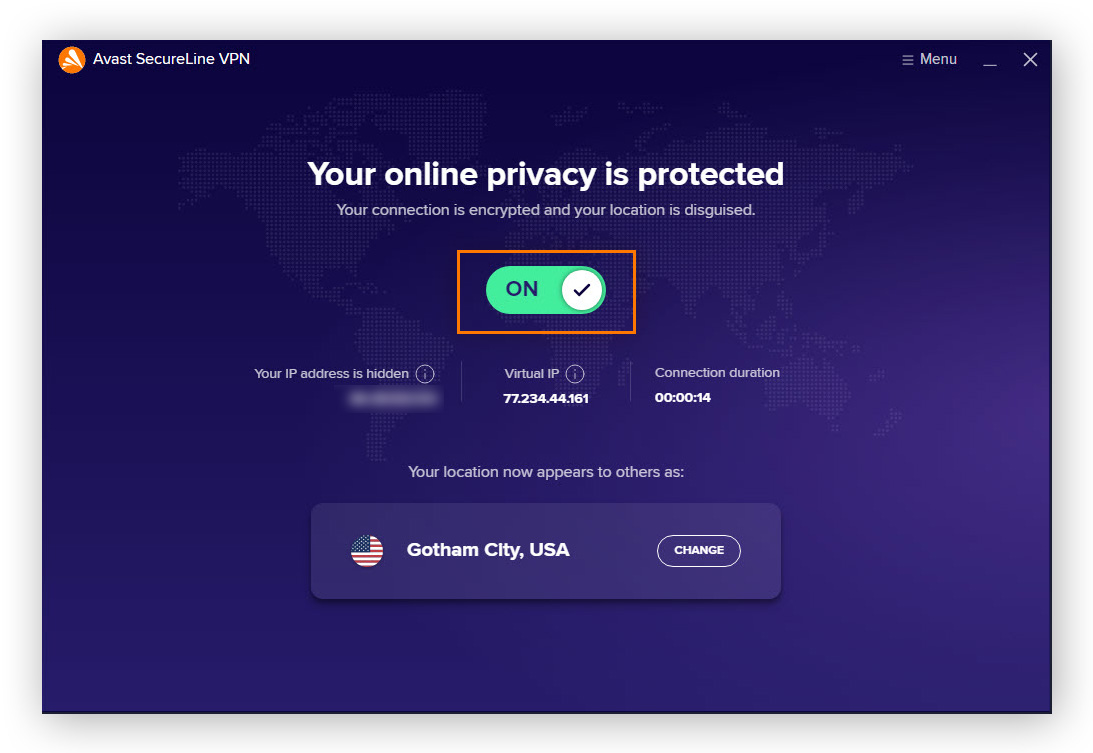
It really is that simple to set up a VPN. Your location will now be hidden, and it will appear as if you’re connecting from the selected server’s location — you can check if your VPN is working by looking up your new IP address. Plus, you’ll enjoy additional VPN benefits, including data encryption, protection against hackers and web trackers, more anonymous browsing, and enhanced streaming access.
While the added security protocols of a VPN may slow your internet down slightly, and some sites try to block VPNs, the privacy, freedom, and security gains outweigh these minor drawbacks for many users. There are lots of great VPN options out there, but it’s best to avoid completely free ones — they often contain ads or monetize user data, and could even harbor malware.
3. Use a proxy server
Proxy servers change your public IP address by routing your traffic through a remote server, rather than connecting directly to a website. Proxy servers, VPNs, and the Tor browser all alter IP addresses by acting as intermediaries between users and the wider internet. But unlike these other, more secure methods, proxy servers don’t encrypt your connection, so your online activity may be tracked or intercepted.
And while proxies are relatively fast, easy to use, and can help you appear to browse from a different location, they come with trade-offs. They can be hard to set up, offer little privacy, and free ones can be risky — some may log your data or steal sensitive info. Still, if you just want to change your IP address, a proxy will do the trick.
Since the process may be slightly different on iOS, Mac, and Android, with alternate names for specific terms, here’s a generic guide to using a proxy server to change your IP address:
-
Get an IP address and port number for a proxy server.
-
Find “proxy” or “LAN” settings in your Network Settings.
-
Enable the proxy server and enter the IP address and port number you’ve chosen.
-
Enter a username and password if necessary.
4. Reset your router
Resetting your router is a quick and easy way to try changing your public IP address. Most home networks use dynamic IPs automatically assigned by your ISP, and restarting the router may assign it a new one. However, your ISP may assign you the same address again, especially if the downtime is short.
This can help if you’re having trouble connecting your devices to your router due to incorrectly configured IPv6 or IPv4 addresses on your home network, and like changing your router's DNS settings, resetting your router can help prevent router hacking on your network. But it doesn’t offer any privacy or location benefits — your new IP address will still be linked to your local network, meaning your location and activity will remain visible.
Here’s how to change your IP address on your router:
-
Find your IP address and note it down — our IP checker can help you with that.
-
Unplug your router for at least 5 minutes — the exact duration may vary depending on how long your ISP typically takes to reset your IP address.
-
Plug your router back in and check your IP address again — it should be different after reconnecting.
Why change your IP?
Changing your IP address can help you evade hackers, snoops, and other forms of surveillance. Because you’re hiding who you are and where you’re located (a crucial part of your online identity), you’ll have many privacy and security advantages. And there are other benefits, too.
Here’s why you should consider changing your IP address:
-
Protect your online privacy: Changing your IP address will hide your real location, protecting you from hackers, unwanted snooping from your ISP, and websites that use web tracking.
-
Access regional content: Due to geo-blocking, you may have trouble streaming a game from your favorite sports team when abroad or get blocked trying to watch a show available only in certain countries. Changing your IP address can let you access your favorite content as if you were at home.
-
Get discounts: Websites often use dynamic pricing, adjusting prices based on your location, browsing history, or past behavior. By changing your IP address, you may be able to access lower prices for flights, hotels, or products.
-
Escape targeted advertising: Advertisers often track your IP to build a profile of your interests and location. By switching IPs — especially with a VPN — you can disrupt this tracking, reduce ad personalization, and make it harder for advertisers to follow you across sites.
-
Market research and quality assurance: Using spoofed IP addresses allows businesses to see how their website or ads appear in different regions, test localized content, and check for pricing or access issues. By simulating user experiences from various locations, teams can ensure consistent performance and uncover regional discrepancies.
-
Avoid website bans: Some governments or organizations use IP addresses to restrict access to certain websites. Hiding your IP address can help you access content and unblock restricted websites to enjoy a freer and more open internet.
-
Troubleshoot internet issues: New routers sometimes give the wrong IP address to devices. Manually changing your IP address solves this problem in seconds. It may also help gamers experiencing lag.
Whatever your IP address is, get proper privacy online
If you’re looking to change your IP address quickly, safely, and effectively, a VPN is the smartest choice. Avast SecureLine VPN makes it effortless, offering powerful bank-grade encryption that shields your activity from your ISP, hackers, and other prying eyes. Try it for free today and start enjoying true online freedom and privacy in just a few clicks.
FAQs
Does turning Airplane Mode on and off change your IP address?
Yes, turning Airplane Mode on and off can change your IP address, especially when using mobile data. Disconnecting and reconnecting to the network may result in a different dynamic IP from your carrier. However, it won’t affect your Wi-Fi IP unless you switch networks or restart your router.
Can you request an IP change from your ISP?
It is possible to request an IP change from your ISP, especially if you're using a dynamic IP. Some ISPs may be able to change it for you upon request, while others might require a reset of your router or network connection. If you need a static IP, that’s typically a paid service.
Does a private browser change your IP address?
No, using a private browser or Incognito Mode does not change your IP address. While private browsing sessions don’t store cookies, browsing history, or cache, your IP address remains unchanged, and websites can still track your location based on it.
What customers say
More Privacy Articles

TCP vs UDP: What’s the Difference and Which Protocol Is Better?

How to Change Your IP Address With and Without a VPN

How to Find Your IP Address on Windows
/Public-vs-local-IP-addresses-Thumb.jpg)
Public vs. Private IP Addresses: What’s the Difference?
IPv4 vs. IPv6: What’s the Difference?

How do I Hide My IP Address?
What is an IP Address?
Static vs. Dynamic IP Addresses
What is TCP/IP and How Does it Work?
How to Disable IPv6 Support in Your Router Settings
IP Address
Privacy
Deepan Ghimiray
3-02-2022