- Security
- Privacy
- Performance
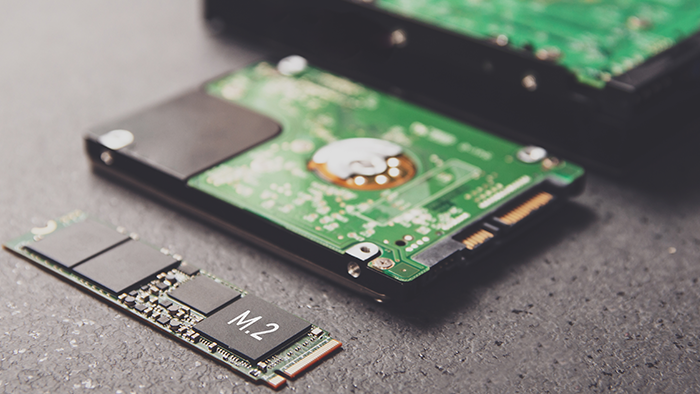
Did you know that deleting files from your hard drive doesn’t fully remove them? To make sure your data is gone for good, you have to erase the drive by resetting your computer or using special software. Learn how to wipe a hard drive or SSD on Windows 10 and 11 or macOS. But first, download our dedicated cleanup tool to help prepare your PC for a hard drive wipe.

This Article Contains
This Article Contains
4 steps to wiping a hard drive in Windows 10 & 11
Erasing a hard drive (HDD) in Windows 11 or 10 is straightforward — simply reset your PC from your Windows settings menu. It’s essential to complete the process in its entirety to ensure your data can’t be recovered.
The complete process involves four main steps:
1. Prepare to erase your hard drive
To avoid losing important data and ensure a smooth reset, prepare your PC before wiping your drive. You can do so by backing up files you want to keep and saving your passwords for future access.
Here’s how to prepare for a complete hard drive wipe on Windows:
Run a quick PC clean-up
Running a quick cleanup on your PC before wiping your hard drive helps remove temporary files, caches, and other unnecessary data and delete files permanently. While this doesn’t make the wipe itself more thorough, it does make it easier to identify and back up the files you actually need to keep.
Here are some benefits to running a cleanup prior to your hard drive wipe:
-
Reduces clutter: Clears out temporary and junk files that don’t need to be saved.
-
Makes backups faster and more efficient: Reduces data to sort through or transfer.
-
Gives you a clearer view of what matters: Helps you see which files and programs are worth keeping.
Download Avast Cleanup to quickly and easily remove cache data, installation files, temporary files, and corrupted data. Our next-generation PC cleaner automatically detects and removes digital clutter, helping your system run smoothly and making it easier to back up important files before a full drive wipe.
Back up your data
There are many ways to back up your data, but the best option before wiping your drive is to create a system image backup and save it to an external hard drive or SSD. This preserves your entire system and stores it safely offline.
Erasing a drive permanently deletes all data, and a backup is the only way to restore your files, settings, and system afterward. For added security, you can copy key files separately and store them both on the external drive and in the cloud for redundancy.
Here are some ways to back up your data on Windows PCs:
-
File backups: Copies of your personal files (documents, photos, etc.) made with tools like Windows File History or by copying via drag-and-drop.
-
System image backups: A complete snapshot of your PC — operating system, apps, and settings — that can be restored to recover your system.
-
Clone your HDD: Tools like Macrium Reflect or Acronis True Image create an exact, bootable duplicate of your entire drive, thereby cloning your HDD.
Here are some ways you can store your backups:
-
Cloud storage solutions: Services like OneDrive, Google Drive, and Dropbox let you store and access files anywhere. Cloud backups work well for documents and photos, though large amounts of data may require a paid plan.
-
External hard drive or solid state drive (SSD): A quick way to create local backups with plenty of space. Your data stays offline, safely stored on your own hardware.
-
USB flash drives: For smaller backups, USB drives are quick and portable. They’re ideal for critical documents, photos, or project files you need on the go.
Save your passwords
Record any passwords or login details stored locally on your device — once you wipe your hard drive, there’s no recovering these Windows passwords and encrypted credentials. This includes any information protected with Windows encryption or password-protected files or folders.
Here are some ways to save your passwords:
-
Use a password manager: Store your passwords in a trusted online password manager protected by two-factor authentication. You can securely access or export them from anywhere — all you need is an internet connection and your master login.
-
Sync your browser account: If you save passwords and auto-fill data directly in your browser, make sure you’re signed in and syncing to ensure your saved logins and autofill data are backed up online. For example, Chrome keeps your passwords up to date only if you’re signed into your Google account.
-
Make a physical record: You can write down important passwords in a notebook, but keep it locked somewhere safe that only you can access. When it’s no longer needed, shred the paper or use another confidential waste disposal method.
-
Use encrypted storage: Save credentials in a file with Windows BitLocker or another encryption software — the digital equivalent of keeping them in a locked safe.
Uninstall programs with personal data
Uninstalling programs that store personal data helps ensure sensitive information isn’t left behind on your hard drive. While secure wiping methods remove all traces of data, simpler resets or quick formats may leave hidden files, logs, or caches intact. Removing these programs beforehand reduces the risk of recovery and helps keep your drive cleaner for reuse.
-
To uninstall programs on Windows 11, go to Settings > Apps > Installed apps > Click the three dots next to the program you want to uninstall > Uninstall.
-
To uninstall programs on Windows 10, go to Settings > Apps > Apps & features > Select the program > Uninstall. Alternatively, go to Control Panel > Programs > Programs and Features > Select the app > Choose Uninstall.
After uninstalling, check C:\Program Files or C:\Program Files (x86) and your AppData folder for leftover files from the uninstalled program. Delete them manually or use specialist tools like Avast Cleanup to remove programs and any residual personal data automatically.
Keep in mind that the AppData folder is hidden by default. To unhide it, go to File Explorer > View > Show > Hidden items (or View > Hidden items in Windows 10).
Create a Windows recovery drive
Creating a Windows recovery drive means you can reinstall Windows if you ever need to restore your system — even after wiping your hard drive. You can also use it to troubleshoot startup issues.
Here’s how to create a recovery drive:
-
Log in to Windows with an administrator account > Insert a USB drive with at least 8GB of free space (16GB recommended).
-
Search Recovery Drive in the Windows taskbar (or Start menu in Windows 10) > Click Open > Click Yes to allow the tool to run with administrator permissions.
-
Select Back up system files to the recovery drive > Next > Select your USB drive > Follow the prompts.

2. Reset your Windows PC
Resetting your PC on Windows 11 and 10 wipes all your programs and data, then reinstalls Windows. It’s a good way to give your PC a fresh start if something isn’t working right, or if you’re going to get rid of it.
Reset in Windows 11
-
Search and open Settings using the Windows taskbar > Click System (from the menu on the left) > Recovery > Reset PC.

-
Select Remove everything > Change settings > Toggle on Clean data? > Confirm > Next > Reset.

Reset in Windows 10
-
Go to Start > Settings > Update & Security > Recovery > Click Get started under Reset this PC.

-
Select Remove everything > Change settings > Toggle on Clean data? > Confirm > Next > Reset.
3. Test for residual data
Even after wiping a drive, it’s smart to check that no personal files remain — you’ll want to make sure nothing private can be recovered or seen by someone else. The most reliable way to test for residual data is by running a scan using third-party data recovery software, like Recuva, EaseUS Data Recovery, or Stellar Data Recovery.
You can also check the drive status using Windows’ File Explorer or Disk Management to make sure it’s actually empty:
-
Via File Explorer: Open File Explorer > This PC > Select the wiped drive. If the wipe worked, it should appear empty or unallocated.
-
Via Disk Management: Press Windows key + X > Disk Management > Confirm the wiped drive shows as Unallocated or with a fresh, empty partition.
Another way to check whether your wipe worked is to perform an overwrite test. Try saving new files to the drive. If you only see the new files and nothing old reappears, it’s a good sign your wipe worked.
4. Reformat your drive for use
After wiping a hard drive on Windows, the drive is left blank, or “unallocated,” meaning there’s no system in place to store or organize files. Reformatting the drive creates a new file system, making it ready for storage, backups, or reinstalling Windows.
Double-check that you’ve selected the correct drive, as reformatting permanently erases everything on it.
Here’s how to reformat a wiped drive on Windows:
-
Press Windows key + X > Disk Management > Find the wiped drive labeled Unallocated.
-
If prompted, initialize the drive by choosing GPT (or MBR for older systems) > Right-click the unallocated space > Select New Simple Volume.
-
Follow the wizard steps: Assign a drive letter (C: will be used automatically if you’re reinstalling Windows) > Select NTFS (or exFAT if you need compatibility with Mac) > Name the drive.
-
Tick Perform a quick format > Finish.
Alternative ways to erase your Windows hard drive
You can erase a Windows hard drive using Disk Management, Command Prompt, File Explorer, or with third-party software. Specialist software is particularly useful for extra security, tricky drives, or when you want more control over the deletion process.
No matter which method you use to wipe your hard drive, remember that the process is permanent — back up any data you want to keep and double-check you’re selecting the correct drive before proceeding.
To use Disk Management and Command Prompt to wipe a drive, you must be logged in as an administrator. To check, go to Start > Control Panel > User Accounts > Look under your account name for the “Administrator” label.
Use Windows' Disk Management
The Windows Disk Management tool can divide hard drive disks into partitions, or volumes. It’s like putting up a wall in a room to create two rooms.
Here’s how to use Disk Management to wipe a disk in Windows:
-
Sign in to your Windows administrator account. If you’re wiping an external drive, connect it to your PC via a USB port.
-
Press the Windows key + X > Select Disk Management.

-
Right-click the drive you’d like to wipe > Format.

-
Choose a file system (NTFS for Windows-only) > Click Perform a quick format > OK.
Use Windows Command Prompt
Using Windows Command Prompt (CMD) to wipe a hard drive gives you direct control over your system without needing third-party tools. This method is especially useful for wiping external or secondary drives before reuse or disposal, as it securely erases all partitions and data from your hard drive and works even if the drive doesn’t appear in File Explorer.
Here’s how you can wipe a hard drive with Command Prompt:
-
Search cmd in the Windows taskbar to bring up Command Prompt > Select Run as administrator.
-
In the Command Prompt window, type:
-
diskpart > Press Enter.
-
list disk > Press Enter. You will see all connected drives numbered in order of detection.
-
select disk X (replace X with the relevant disk number) > Press Enter.
-
clean all > Press Enter.
-
exit > Press Enter.
-
After wiping, the drive will appear as unallocated space, and you’ll need to reformat it in Disk Management before using it again.
Format an external drive
Formatting an external storage device wipes any data on it and prepares it for use with your device. You can easily do this in File Explorer.
Here’s how to reformat a hard drive with the Format tool in Windows:
-
Connect the external drive to your PC via USB > Open File Explorer.

-
Right-click on your external disk > Click Format > Choose a file system and follow the instructions.

If your external drive doesn’t appear in File Explorer, that may be because its current format is incompatible with Windows. In that case, you need to use the Disk Management tool to wipe it.
Use third-party software to wipe your hard drive
Specialized data sanitization software can scrub your hard drive clean — and some of the best data destruction tools are free.
Here are a few data wiping apps you can try:
-
CCleaner is a longtime player in the file management space and has free options. To fully wipe your data, you’ll need the premium version. CCleaner is installed on your computer, so it can’t wipe the drive hosting your OS.
-
CBL Data Shredder allows you to create a bootable CD or USB drive. Booting from this media lets you run the tool outside Windows, so you can securely erase your entire hard drive — including your main system drive. It doesn’t work with Windows 11.
-
DBAN is a popular and free data wipe tool, although it doesn’t work on solid-state drives (SSDs). It works from outside your operating system (OS), so you can use it to wipe your entire machine.
-
Eraser is a free, open-source tool that securely deletes files, folders, or entire drives. It works securely and erases both HDDs and SSDs when used with the correct settings.
-
Blancco Drive Eraser is a professional-grade tool used by businesses for secure, certified data destruction (HDDs and SSDs). It is a paid tool, but a free trial is available.
-
HDShredder allows you to wipe an entire drive using the free version, with some paid versions allowing independent partition wiping (for wiping part of a drive).
Wipe a Mac hard drive in 4 steps
The process for wiping your Mac’s disk depends on whether you have a hard disk drive (HDD) or an SSD. To find out what’s in your Mac, click the Apple icon > About this Mac > Storage.
I checked my Mac, and it shows a 1 TB SSD, referred to as “Flash Storage”. If you have an HDD, it might say “Hard Disk” or “Apple HDD” instead.

1. Prepare to erase your hard drive
Before wiping your Mac’s hard drive, preparation helps prevent data loss, speeds up the erasing process, and makes the drive ready for fresh use. This includes backing up important files, saving passwords, and cleaning up any hidden files or downloads.
Back up your data
Before wiping your drive, manually back up your data to an external storage device or cloud storage solution.
Here’s how to back up your Mac using Apple’s built-in Time Machine utility:
-
Connect your external storage via USB or Thunderbolt.
-
Go to Finder > System Settings (or System Preferences on older Macs) > Time Machine.
-
Choose your external drive under Backup Disk > Click the three dots next to the selected drive > Back up now.
If you only need to save certain files and folders, you can use iCloud. Keep in mind that this doesn’t create a full backup of your apps or settings. If something goes wrong during the wipe, you won’t be able to restore your system to its previous state.
Here’s how to enable iCloud and sync your files and folders:
-
Click the Apple icon > System Settings (or System Preferences on older Macs) > Apple ID > iCloud.
-
Toggle on iCloud Drive > Click Options > Desktop & Documents Folders to automatically back up content in those drive locations.
-
To sync files from other locations, open Finder > iCloud Drive > Drag and drop any files or folders you want to back up into iCloud Drive.
Save your passwords
Save all passwords and login credentials on your Mac to prevent losing access to your accounts after you erase your drive.
You can sync passwords saved in Keychain Access (Mac’s built-in password and credential storage tool) to iCloud, although you can’t export them in bulk for security reasons.
To preserve them safely, go to System Settings > Apple ID > iCloud > Passwords & Keychain > Turn on iCloud Keychain. This will sync your passwords to your Apple ID. Alternatively, you can view and copy individual passwords to a secure location manually.
You can also export saved passwords from Safari: Click Settings > Passwords > Confirm your credentials > Click the three dots at the bottom left > Export Passwords. Other browsers, such as Chrome or Firefox, will have similar export options in their settings menus.
Uninstall programs with personal data
It isn't essential to delete individual programs and associated files if you plan to do a full, secure wipe. However, removing them beforehand can help reduce the chance of leftover data if the wipe is incomplete.
Some applications store personal information, cache files, or usage logs that won’t disappear just by dragging the app to the Trash. To fully remove them, you’ll need to delete both the app and its residual data.
Here’s how to uninstall programs and delete associated files before a hard drive wipe:
-
Open Finder > Applications > Drag the app you want to remove into the Trash.
-
Right-click the Trash icon > Empty Trash.
-
Click the Go menu in the top bar > Hold the Option key to open Library > Open the Application Support, Preferences, and Caches folders one by one.
-
Look for folders or files named after the app you just deleted and drag them into the Trash.
-
Right-click the Trash icon > Empty Trash.
Run a quick cleanup on your Mac
To streamline your wipe, clear caches, temporary files, and downloads. You can do this manually, using Apple’s Finder, or automatically, with tools like Avast Cleanup.
Using Finder:
-
Go to Finder > Downloads > Drag unneeded files to the Trash.
-
Press Shift + Command + G > Type ~/Library/Caches > Delete files inside the folders.
-
Press Shift + Command + Delete to empty your Trash.
Using Avast Cleanup for Mac:
-
Download, install, and open Avast Cleanup for Mac.
-
Click Quick Clean > Select items you want to remove > Clean.

Avast Cleanup helps you reclaim storage, remove hidden junk, and boost performance in just a few clicks. It deep-scans your system to find leftover files, duplicates, and unused apps that silently slow things down. Download Avast Cleanup for Mac to help your Mac run cleaner and smoother — and get it ready for your full drive wipe.
2. Use the Disk Utility tool
Mac’s Disk Utility is a built-in tool that lets you securely erase data, reformat the drive with the proper file system, and ensure it’s ready for storage or a fresh macOS installation.
The steps for wiping your hard drive with the Disk Utility Erase function differ depending on whether your Mac’s processor chip is Intel or Apple Silicon (M1/M2). To check your chip, click the Apple icon > About (or About this Mac).
The Erase function also reformats the drive, creating a fresh, organized file system and ensuring the drive is ready to store files or reinstall macOS.
Mac with an Intel processor
-
Turn your Mac off > Press the power button and immediately hold down the Command + R keys until you see the Apple logo.
-
Click Disk Utility > Erase > Select your drive > Choose a file system (APFS for SSDs and newer macOS or Mac OS Extended for older Macs or pre-High Sierra compatibility).
-
Click Security Options > Move the slider all the way to the right for the most secure option.
-
Select Erase > Done.
If your drive is formatted as APFS, you won’t see Security Options because APFS doesn’t support secure erase. In this case, you can perform a standard format to erase your drive contents: go to Disk Utility > Erase > Select your drive > Erase > Done.
Mac with an M1/M2 chip
-
Turn your Mac off > Press and hold the power button until you see the Startup Options window > Choose Options > Continue.
-
Click Disk Utility > Select your drive > Click Erase > Choose a file system for your drive (APFS for modern Macs or Mac OS Extended for older Macs) > Erase Volume Group.
3. Check for any remaining data
After wiping your Mac, it’s a good idea to verify that all personal files are gone from your Mac’s hard drive to ensure no sensitive information can be recovered by someone else.
Here’s how to check that your wiped Mac drive is empty:
-
Open Finder > Browse the drive you just erased. It should appear empty or show only the new volume name.
-
Press Shift + Command + G > Type ~/Library to see if any old files remain.
Wiping a device's solid-state drive
Wiping a solid-state drive (SSD) differs from wiping a traditional hard disk drive (HDD) because SSDs store data differently. SSDs often include built-in features like TRIM (which tells the drive which spaces are free) that affect how data is erased.
The steps vary across platforms, so the process for Windows PCs is different from Macs. Below, we’ll cover the best methods for securely wiping SSDs on each system.
Wiping an SSD on Windows
-
Back up your data. Save important files, passwords, and any credentials, as a wipe will permanently delete everything. Use cloud storage, an external drive, or a cloning tool.
-
Use your SSD manufacturer’s secure erase tool. Utilities such as Samsung Magician, Crucial Storage Executive, or Intel SSD Toolbox issue a built-in “secure erase” command that resets the drive’s encryption key and safely clears all data. Some tools require you to boot from USB before erasing.
-
Check that the SSD is empty. Browse the drive in File Explorer to verify it shows as unallocated or empty in Disk Management, or run a data recovery tool to confirm no files can be recovered.
If your SSD is discontinued or an unbranded model, and you can’t find a compatible secure erase tool, you can use the Windows Reset to reinstall Windows and overwrite existing user data.
-
Go to Settings > System (or Update & Security on Windows 10) > Recovery > Reset this PC > Remove everything > Clean the drive fully.
Windows Reset will overwrite data sufficiently for most people, but it’s not foolproof.
Wipe a Mac with an SSD
If you’ve upgraded your Mac to an SSD that now needs wiping, you’ll need to perform a crypto erase to wipe your drive. This can be done using a built-in tool called FileVault utility, which encrypts the data and provides you with a cryptographic key. By deleting the key, you render your data unrecoverable.
Here’s how to do an SSD crypto erase using a Mac:
-
Restart your Mac in Recovery mode:
-
Intel Macs: Press and hold Command + R.
-
Apple Silicon (M1/M2) Macs: Press and hold the power button.
-
-
Go to Disk Utility > Select your drive > Click Unlock.
-
In Disk Utility, click Erase > Follow the instructions.
This method only works if FileVault was already enabled. Turning FileVault on immediately before erasing doesn’t retroactively encrypt data that was previously unencrypted — it only protects new data written after encryption begins.
To enable FileVault in advance, go to System Settings > Security & Privacy > Select the FileVault tab > Turn On FileVault.

Physically wipe your hard drive
Physically wiping a hard drive involves removing and breaking up the hardware components of your drive so that data cannot be recovered. This is typically done when disposing of drives with highly sensitive, confidential, or legally protected information, or when the drive is too damaged to be securely erased by software. It’s the only foolproof method for permanent data removal.
Use the rare-earth magnet method
A powerful rare-earth magnet can disrupt the magnetic fields on a traditional HDD, making the data unrecoverable. This method doesn’t work on SSDs because they use flash cell memory, not magnet fields.
Here’s how to use a magnet to wipe your hard drive:
-
Buy a strong rare-earth magnet (neodymium is most widely available).
-
Place your hard drive on a non-metallic surface.
-
Move the magnet across the surface of the drive several times, focusing on the platters inside. Platters are shiny and circular, similar to a CD.
-
Connect the drive to a computer to check that it can no longer be read.
Unfortunately, this method is unreliable for modern hard drives due to denser data storage and magnetic shielding. And if the magnet isn’t strong enough or not applied properly, some data may remain readable. If you want to be sure no data can be recovered, use a degausser, an electric device that creates a powerful, fluctuating magnetic field.
Keep in mind also that strong magnets can damage any device that relies on magnetic fields, including credit cards and ID cards with a magnetic strip, speakers and microphones, TV and computer monitors, and other hard drives.
Remove and disassemble your hard drive
Physically opening the hard drive and destroying the platters ensures complete data destruction. This works for both HDDs and, in some cases, SSDs.
Here’s how you can physically remove and wipe your hard drive:
-
Power off and unplug your computer, and then use a screwdriver to open the casing.
-
For HDDs, scratch, shatter, or sand the platters. For SSDs, remove and destroy the memory chips.
-
Dispose of the pieces safely according to local electronic waste guidelines.
Hard drives and SSDs can have sharp edges, delicate components, and chemical coatings, so wear gloves and eye protection when destroying and disposing of the components.
Can you completely wipe a hard drive?
Yes, you can completely wipe a hard drive, but you’ll need to do more than simply delete the files stored on it. Deleting files from a hard drive doesn’t actually remove them — it just reassigns that space so new files can be added later on. To clean a drive completely, you need to actually erase the data using software, physical methods, or both.
When should I completely wipe a hard drive?
Properly wiping a drive prevents anyone from recovering the deleted data, making it essential before selling or discarding your drive. Wiping a hard drive is also an essential part of reformatting a drive, when you delete all the data on it in order to change its file system to match a new operating system.
Here are some common reasons to erase an HDD or SSD:
-
When selling, trading in, or throwing out a computer: Wipe your hard drive before disposing of any computer or laptop to ensure your personal data can’t be recovered.
-
When getting rid of damaged drives: Even damaged, failing hard drives can have recoverable data that could be stolen or sold on the dark web. For SSDs with TRIM, files may be overwritten, but wiping ensures your drive is fully clean.
-
When upgrading to a solid-state drive: After upgrading your hard drive to an SSD, wipe your old HDD before selling or disposing of it — or reuse it as external storage with a casing.
-
When starting over from square one: Wiping a hard drive is drastic but effective — restoring performance, fixing 100% disk usage on Windows, and removing bloatware.
-
After a malware or ransomware infection: Wiping your hard drive is sometimes the only way to guarantee malicious code is fully removed.
If you just want to free up disk space on your hard drive, you can find and delete temporary files hiding in odd places. Or, you can consider defragging your hard drive to add some space. But these solutions aren’t ideal if you plan to get rid of your hard drive afterward.
Optimize your drive with Avast Cleanup
Wiping a drive is an effective security measure, but it’s also important to keep your drive clean while you’re still using it. A clean hard drive runs faster — and Avast Cleanup can handle it all automatically. Delete junk files and bloatware, snooze resource-hungry apps, and maximize the performance of your computer.
What customers say
More Performance Articles

Why Your Mouse Is Broken or Not Working and How to Fix It

What Motherboard Do I Have & How Do I Find Out?

How to Check and Monitor Your CPU Temperature
SSD vs. HDD: Which Do You Need?

What Is the Difference Between Thunderbolt and USB-C?

11 Reasons Why Your Phone Is Overheating

AMD vs. Nvidia: Which Is the Best GPU?

AMD vs Intel: Which CPU Is Better in 2023?

What Is a Solid-State Drive (SSD)?
What Is RAM and Why Does Random Access Memory Matter?
How to Check How Much RAM You Have on Windows PC or Mac

How to Check Specs on Windows PC
Hardware
Performance
Oliver Buxton
27-01-2022