- Security
- Privacy
- Performance
Upgrading your Mac to an SSD (solid state drive) is not easy, but it may help keep your Mac running at its maximum speed and performance. Read on to learn how to upgrade your Mac with an SSD drive. Then, keep your drive running at its best with Avast Cleanup for Mac.
/Academy-How-to-upgrade-your-Mac-with-an-SSD-Hero.jpg?width=1200&name=Academy-How-to-upgrade-your-Mac-with-an-SSD-Hero.jpg)
This Article Contains
This Article Contains
Which Mac hard drives can be replaced?
While many Mac hard drives (HDD) can be replaced, some Macs are more difficult to take apart than others. Replacing the hard drive can be an expensive task, so carefully consider whether you should upgrade and replace your Mac’s hard drive.
Apple’s changes to the design and construction of its computers have made Mac hard drive replacement practically impossible in Macs made after 2016. However, a portable SSD can be connected via a high-speed external port, so there are still options to upgrade your SSD if your Mac is from 2017 or later.
To replace your Mac’s hard drive, you’ll need to have:
-
A new SSD.
-
A screwdriver and extra screws (mainly Phillips and Torx, of varying sizes).
-
A spudger to maneuver your device’s little nooks and crannies.
-
Computer cleaning supplies, such as canned air and a microfiber cloth, to keep your device dust-free.
How to upgrade the hard drive on a MacBook Pro
To upgrade your MacBook Pro to an SSD, there are a few steps you need to take. Macs from 2017 or later may not be able to be upgraded this way due to the device’s design — check if your MacBook Pro will allow hard drive replacement. All MacBook Pros with retina displays are already equipped with an SSD.
Here’s how to upgrade the hard drive on your MacBook Pro to an SSD:
/icon_03.svg) Clone your existing hard drive
Clone your existing hard drive
Before upgrading, clone your existing hard drive so that you don’t lose any valuable data. You can easily do this using the Disk Utility app, following the steps for the Restore function, or use a backup app like Time Machine to clone your hard drive.
/icon_04.svg) Remove the hard drive from your MacBook Pro
Remove the hard drive from your MacBook Pro
Once you’ve backed up your data, you can proceed with your MacBook Pro hard drive replacement. Installing a third-party SSD into your Mac may void your warranty, so follow these steps carefully or enlist a professional.
Here’s how to remove the hard drive from a MacBook Pro:
-
Ensure that your MacBook is powered off, and flip it over onto a hard, flat surface.
-
Remove the screws securing the back panel, using a Phillips #000 screwdriver.
-
Lift the lower panel carefully, wedging your fingers into the gap between the vent and the case to lift the panel up.
-
Disconnect the battery connector from the logic board. Usually, this connector is black and located along the edge of the logic board. It may be removable via tab, or via spudger.
-
Remove the screws securing the hard drive, once you’ve located it. The hard drive should be easy to spot, as it’s large and rectangular, and usually labeled with its storage and speed capacity. (The screws are usually Phillips screws.)
-
Remove the black bar holding the hard drive in place. This may also require removing some screws.
-
Lift the hard drive out by pulling on the plastic tab. After detaching the black bar from the hard drive, you’re free to replace the hard drive in your Mac.
/icon_05.svg) Install an SSD in your MacBook Pro
Install an SSD in your MacBook Pro
To install an SSD in your MacBook Pro, you first need to get one. There are several different types to choose from, so research and choose the SSD that best suits your budget, speed, and capacity needs.
-
Put screws in the sides of your SSD so you can secure it into your MacBook. You can usually get these screws from your old hard drive.
-
Connect the black bar (also known as the ribbon cable connector) to the SSD. Be sure not to twist the cable, and check that the connector is securely inserted.
-
Put the SSD in place by inserting one side first, then the other.
-
Secure the SSD by reinstalling the bracket, fastening it in with Phillips screws.
-
Check whether the SSD works (recommended) before replacing the bottom cover. Turn the MacBook on its side and press the power button. If the usual start-up chime goes off, the installation was successful. A sound of broken glass may mean something went wrong, and you should reinstall the old hard drive to check whether your device was damaged.
-
Set the bottom cover back in place and screw it back in. Ensure that the screws are nice and tight before using your MacBook.
Once you’ve upgraded your MacBook Pro to an SSD, you can install macOS (if it’s a new SSD) and restore your data. You may also want to format your old hard drive and wipe it clean so you can resell or scrap it without compromising your data.
To keep your MacBook Pro running smoothly long after its SSD upgrade, get Avast Cleanup for Mac. Avast Cleanup automatically collects all the duplicates, junk files, and browser caches that clutter and slow down your Mac over time, allowing you to delete it all in just one click.
Maintaining a high-performance Mac is easier than ever, so start cleaning up your Mac today.
How to upgrade the hard drive on your iMac
To upgrade the hard drive on your iMac, you need the right tools — so get an iMac SSD upgrade kit. Then, follow these steps to clone, remove, and replace your hard drive.
Clone your iMac hard drive
First, clone your iMac’s hard drive to save all your data. Use an external hard drive and the Time Machine app, or use the Disk Utility app.
Remove the hard drive from your iMac
Once you’ve cloned your hard drive and backed up your data, remove the hard drive from your iMac. In addition to the typical tools, you’ll need heavy-duty suction cups and a service wedge to remove certain parts without damaging them.
The steps for removing and upgrading may vary depending on your iMac model. You can easily upgrade iMacs made in 2011 and earlier, but for iMac models made in 2012 and later, an external solution is your best bet. You can check what’s possible for your Mac by looking up the EMC or serial number.
Here’s how to remove an iMac hard drive from an aluminum intel iMac 2011:
-
Unscrew the RAM access door and remove it.
-
Remove the front cover glass by using heavy-duty suction cups. This step should be fairly easy as the glass is secured by magnets, not by screws. Carefully set the cover aside.
-
Remove the screws from the bezel with the TR8 screwdriver.
-
Loosen the bezel manually, starting from the top and working down to the bottom of the frame.
-
Disconnect the microphone cable and set the bezel aside.
-
Disconnect any cables and remove any screws that are keeping the screen connected to the iMac.
-
Lift the screen from left to right so you can see the inside of the iMac. You’ll see cables connecting it to the logic board. Have someone help you or use something to prop up the screen so your hands are free to disconnect the cables.
-
Disconnect the thermal sensor by using your fingernails or a spudger to pull out the connector.
-
Remove the hard drive by pushing down and then lifting up. You may need to brace yourself against the foot of the iMac to remove it, since the hard drive can be quite snug.
-
Disconnect the other cables using a spudger to avoid damaging the cables.
-
Remove the parts on the old hard drive that will be used to screw in the new drive, such as screws, EMI tape, the bracket, and thermal sensor. Set these aside for when you need them again.
Install an SSD in your iMac
Once you’ve taken apart your iMac and removed your hard drive, installing the SSD on your iMac takes just a few simple steps.
-
Place the parts from the old hard drive onto the SSD — see the last step in the previous section.
-
Snap the SSD into place, oriented in the same direction as the old hard drive.
-
Plug in the data, SATA and power connectors.
-
Screw back the screen and bezel. Be sure to reconnect the microphone cable before screwing in the bezel. (Tip: Test the iMac to make sure it works before fully screwing in the bezel.)
-
Put the front cover glass back on and clean it so you don’t have any fingerprints or dust on the screen.
After installing the SSD in your iMac and putting your computer back together, you can install the operating system (OS) and restore your data.
How to upgrade your MacBook Air with an SSD
To give your MacBook Air an SSD upgrade, first check which model your MacBook Air is by looking up the model number and EMC number. Methods differ between earlier models and MacBook Air models made after 2013.
Remove the hard drive from your MacBook Air
A MacBook Air from before 2010 likely has an HDD. Most models manufactured since then have the slimmer, sleeker SSD (though you may still want to upgrade your SSD to one with more storage capacity).
Your model also impacts what kind of SSD you can use to replace your old drive. Apple’s designs often make it difficult to replace internal components. Even if you have a compatible SSD, you may still need to get an adapter to ensure it fits.
-
Unscrew the bottom panel. Remove the panel by first lifting up the back, then sliding it toward the back. You should hear a click as the mounting tabs release.
-
Remove the battery if it’s covering the hard drive. (For models manufactured after 2011, this step can be skipped, as the battery doesn’t cover the drive.)
-
Disconnect all cables from the hard drive that was originally installed. To avoid damaging the cables, you may need to use a spudger. Remove all screws holding the hard drive in place.
-
Remove the hard drive.
-
Remove the parts you need to transfer to the SSD: the bracket, shock absorber, and connector.
Install an SSD drive in your MacBook Air
You’ll need the same tools for installing the SSD as you need for removing the hard drive. Different models have varying logic board designs, which may affect the space allotted for the SSD. Check your MacBook Air’s model number to ensure you get the right SSD before you start.
-
Check and gently place the SSD to ensure it fits in the space provided. If it’s too big or too small, you’ll probably need to try another SSD.
-
Screw the SSD into place with the appropriate screws.
-
Replace the back cover and screw it in.
-
Reboot your MacBook Air using Cmd + R to get into Recovery Tools and start up your Mac. If everything looks good, then your replacement was successful.
Once you’ve got your new SSD installed, restore the data from your old hard drive onto your new SSD.
How to upgrade your Mac mini hard drive
The process for replacing or upgrading your Mac mini hard drive might be doable by yourself if you’ve got the tools. But Mac mini models from 2019 and later may have the hard drive fixed in place, making it impossible to remove. In that case, you can connect an external SSD via the USB 3.0 port.
Remove the hard drive from your Mac mini
Before removing the hard drive from your Mac mini, clone your data onto your new SSD or an external hard drive so you don’t lose anything.
The following instructions are based on the 2014 Mac mini model — models made before 2014 have a more involved disassembly procedure.
-
Flip the Mac mini onto its bottom and remove the round cover by prying it open with your spudger at each of the three posts snapped in place, then lift the cover.
-
Remove the three posts that held the foot on using a TR-6 screwdriver.
-
Remove the screws holding the metal cover in place.
-
Carefully lift the cover up and to the right, as it is still attached to the Mac mini via the AirPort antenna cable inside.
-
Gently wiggle the drive out of its socket by removing the screw on the left-hand side.
Now that you’ve got your hard drive out, you can install an SSD in your Mac mini.
Install an SSD in your Mac mini
-
Install the SSD connector cable, connecting it to the two small holes located on the right hand side of where the hard drive would go.
-
Attach the connector to its socket in the logic board.
-
Place the small metal plate on the connector on the logic board.
-
Secure the plate using T6 screws.
-
Align the notch in the SSD with the pin in the drive slot, and make sure the screw side is also aligned.
-
Slide the SSD into its drive slot.
-
Screw it in place with a T3 screw.
-
Put the Mac mini back together.
Flip your Mac mini back over and turn it on to check if your installation went well. Then proceed to get your device back up and running.
Install MacOS on your new SSD
Now that you have a shiny new SSD humming in your Mac, you need to get your device back up and running. You may be able to clone your hard drive to the new SSD before upgrading, but in some cases, you may need to install it blank, with no operating system.
To get your data back on your Mac, install MacOS on your new SSD. Thankfully, installing MacOS on a new SSD is pretty straightforward and varies little across the different Apple computers.
-
Press Opt + Cmd + R to open Recovery Tools.
-
Select Disk Utility and erase your drive (even if there’s no data on it).
-
Quit Disk Utility and select Reinstall MacOS.
Once MacOS is installed on your SSD, you can recover your data and use your Mac as usual. If you’ve installed your old OS, you may find some now-useless apps to uninstall from your Mac and further speed up your machine.
What is an SSD?
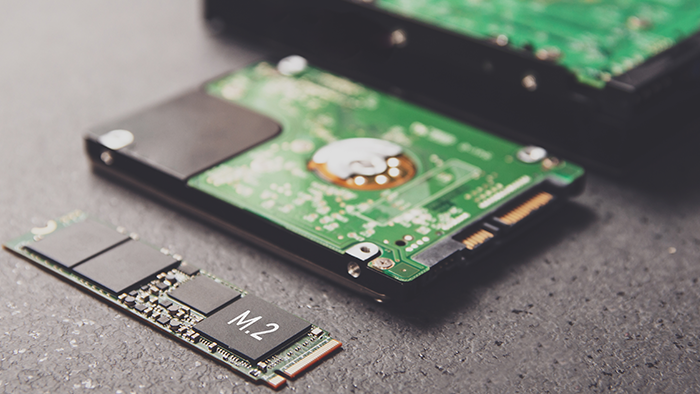
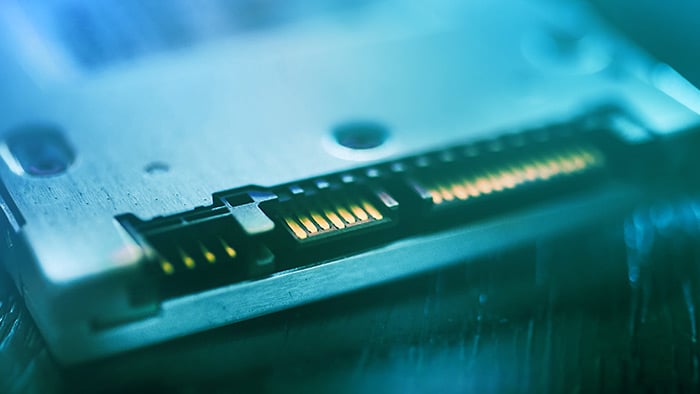
SSDs (solid state drives) are newer, faster versions of HDDs (hard disk drives). The solid state in the name refers to the fact that the drives use electronic circuits to store and access data, rather than mechanical moving parts.
SSDs come in many types and capacity sizes, so finding the right one for an iMac or Macbook SSD upgrade should be easy. The mechanical parts in an HDD make it more prone to failure over time, and SSD replacement is often more cost effective in the long run.
If your Mac uses an HDD, you may want to upgrade your Mac to an SSD to improve both speed and performance as well as expand and free up disk space.
Do you need to upgrade your hard drive?
You may need to upgrade your hard drive if your storage is full or your drive is very old. An upgrade can increase your storage capacity and upgrade your device as a whole. An upgraded hard drive can also boost your device’s performance when working with resource-intensive software such as video editing apps.
Even after an Apple hard drive replacement, Macs (and all devices) eventually slow down. There are things you can do to speed up your Mac, such as checking your internet connection or even just updating your OS. You can also clear your browser cache and defrag your Mac to create more disk space and speed things up.
Doing most of the above will help keep your Mac clean (and your iPhone may also benefit from some cleaning). But the best way to keep your Mac as clean as possible is to use software to automate the process.
Avast Cleanup for Mac includes an app uninstaller, disk cleaner, and duplicate photo finder to ensure that your device stays free of the digital clutter that builds up over time. Avast Cleanup automatically detects all the files and apps taking up space and lets you delete them all in a single click.
Keeping your virtual workspace clean has never been easier.
/icon_01.svg) SSD vs. HDD: speed
SSD vs. HDD: speed
SSDs surpass even the fastest MacBook HDDs in speed across the board, because of how SSDs work versus HDDs. SSDs use electric circuitry, while HDDs have physical moving parts — and it’s no contest between electricity and physical parts in terms of speed.
An SSD means shorter wait times when starting up and opening apps. It can run resource-intensive programs like photo and video editing without lagging. An SSD can also multitask without slowing down.
/icon_02.svg) SSD vs. HDD: capacity and cost
SSD vs. HDD: capacity and cost
SSDs offer a wider range of capacity sizes than HDDs: from a mere 120GB to over 30TB compared to HDD’s 250GB–20TB capacity. But SSDs are a newer technology, so they’re generally more expensive than HDDs, especially the larger-capacity models.
Still, the higher up-front cost can be worth it, because SSDs run faster than HDDs and have been found to last longer, as well. Whatever the size of your current drive, get an SSD with at least 20–50% more capacity to allow for future expansion. After all, you want to keep using your Mac for a long time.
However, an SSD alone may not get your Mac working at its previous speed and capacity. Macs can get viruses, so you should use security software. And use cleanup software to keep your Mac streamlined and clean of junk files.
Keep your Mac working at its best with Avast Cleanup for Mac
No matter the size or capacity of your Mac’s drive, keeping it free of clutter is a challenge. Avast Cleanup for Mac will maintain your Mac’s high speed and performance by finding old, duplicate and junk files that are better off in the trash. Avast Cleanup’s new uninstaller feature scans your Mac for unused apps and deletes all leftover data from uninstalled apps, leaving no trace on your device.
Avast Cleanup also lets you review and delete all junk files in a single click, freeing up space for the apps and files you actually need. Get it today for a cleaner drive and optimal Mac performance.
What customers say
More Performance Articles

Why Your Mouse Is Broken or Not Working and How to Fix It
What Motherboard Do I Have & How Do I Find Out?

How to Check and Monitor Your CPU Temperature
SSD vs. HDD: Which Do You Need?
What Is the Difference Between Thunderbolt and USB-C?

11 Reasons Why Your Phone Is Overheating
AMD vs. Nvidia: Which Is the Best GPU?
AMD vs Intel: Which CPU Is Better in 2023?
What Is a Solid-State Drive (SSD)?
What Is RAM and Why Does Random Access Memory Matter?
How to Check How Much RAM You Have on Windows PC or Mac

How to Check Specs on Windows PC
Hardware
Performance
Danielle Bodnar
10-09-2021